How to set up Headless NextJS app in Connected Mode on Sitecore?
Published: 26 May 2023

In the previous blog, we installed the Sitecore Headless Next JS app in the Disconnected Mode blog. In this blog, we are continuing the Sitecore Headless Next JS app setup with Connected Mode.
We have already configured disconnected mode so now we are following the below steps for connected Mode in Sitecore Headless JSS.
Step: 1 Firstly we need to assign new binding for our CM instance to run the next js application for connected mode.
Create SSL Certificate and add new Binding:
Create a new SSL certificate and assign it to CM in IIS. Execute the below PowerShell script to generate a new SSL.

Now this generated certificate adds to trusted certificates. And open IIS and add a new binding to your CM instance and select the newly generated certificate.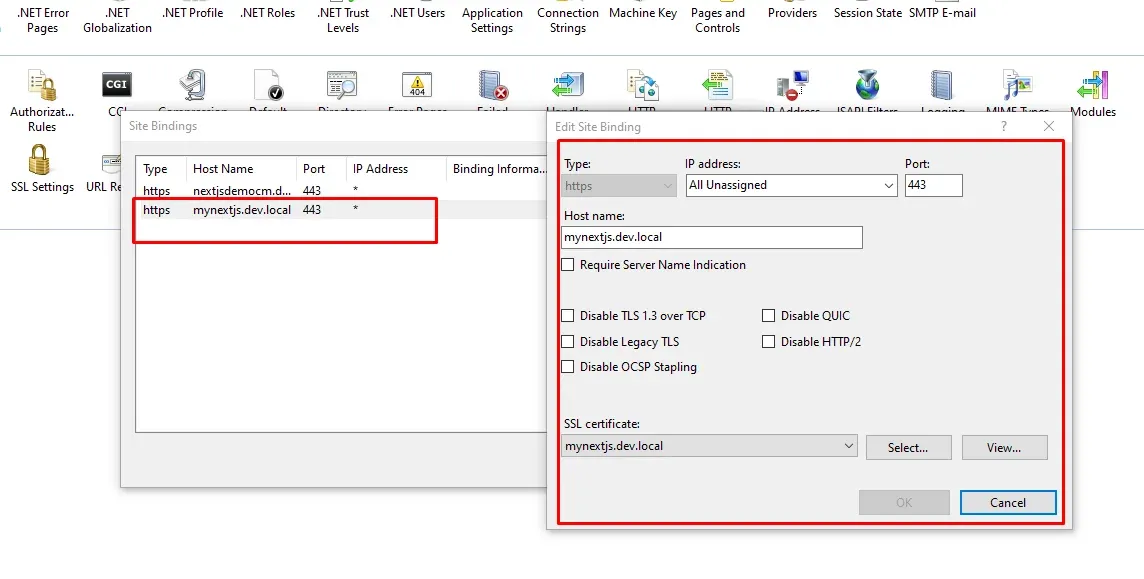
And now add a new hostname in your machine host file entries. So, Go to C:\Windows\System32\drivers\etc and add the hostname in the host file.
Step: 2 Generate New API Key in Sitecore CMS
Please follow the below steps for creating new API key:
- Open the Sitecore Content editor.
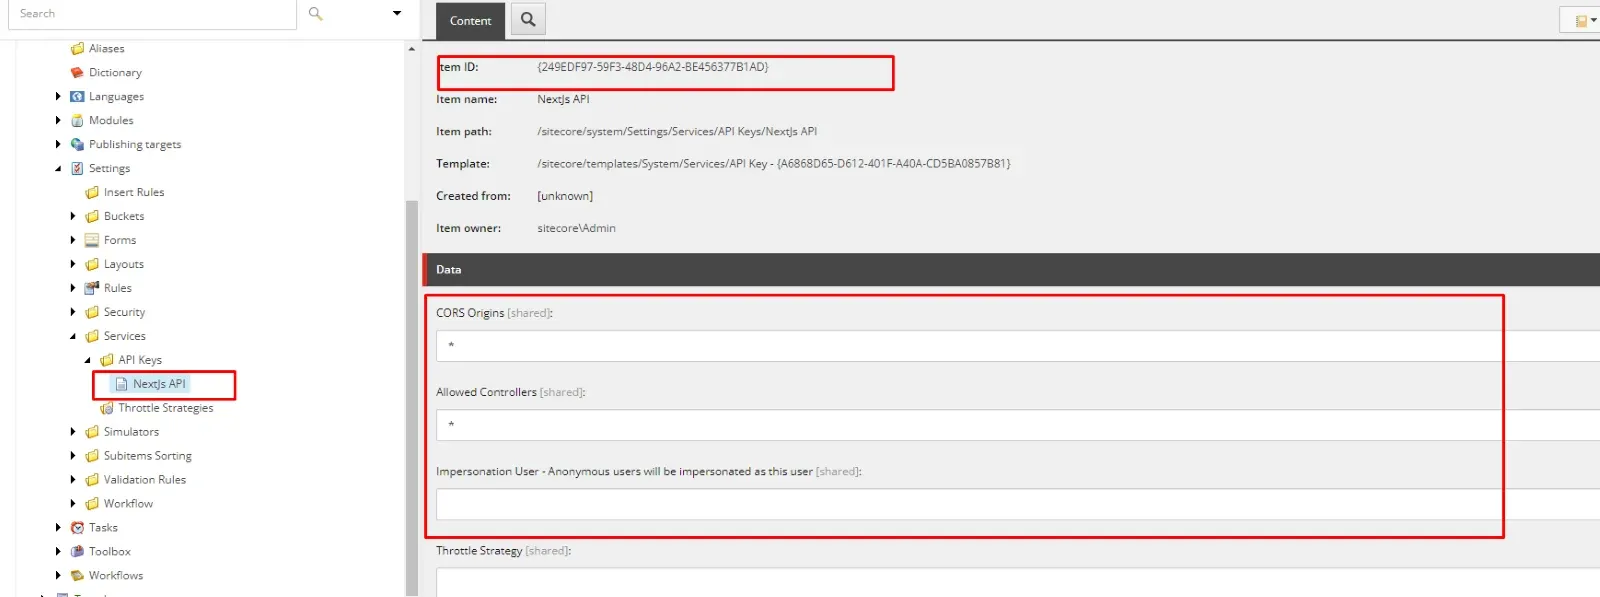
- Navigate to Sitecore/system/Settings/Services/API Keys.
- Now Create a new API key called "Nextjs API". You can add a name as per your need.
- Enter "*" in the CORS Origins and Allowed Controllers fields.
- Remember to copy the Item ID, which serves as the API key.
Now open your NextJs app folder in Visual Studio Code and open new the terminal panel and execute the below command for setup connected mode,
jss setup
After executing this command you need to fill below details as per image,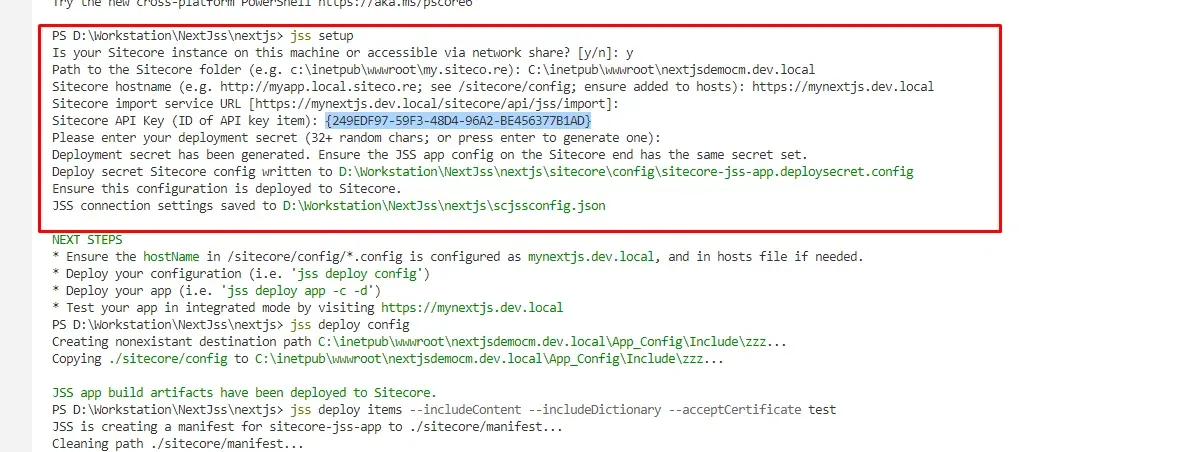
Now you can verify these values are properly updated in scjssconfig.json in the NextJs app root folder.
Step: 4 Deploy config files
After verifying details you need to deploy configs files. Open your terminal and enter jss deploy config to publish the config to Sitecore.
Now verify your configs are copied to Sitecore CM instance:
\inetpub\wwwroot\nextjsdemocm.dev.local\App_Config\Include\zzz
Step: 5 Pass your newly created SSL certificate thumbprint
We need to pass the SSL certificate thumbprint. Now open a new terminal and run the below command to get the thumbprint.
jss deploy items --includeContent --includeDictionary --acceptCertificate test
Now you can copy the thumbprint from the error message and run the deploy command again with the correct thumbprint now.
jss deploy items --includeContent --includeDictionary --acceptCertificate 97:CA:EE:CE:34:FF:62:46:AA:23:11:97:F4:8E:C3:3F:29:2A:CB:CB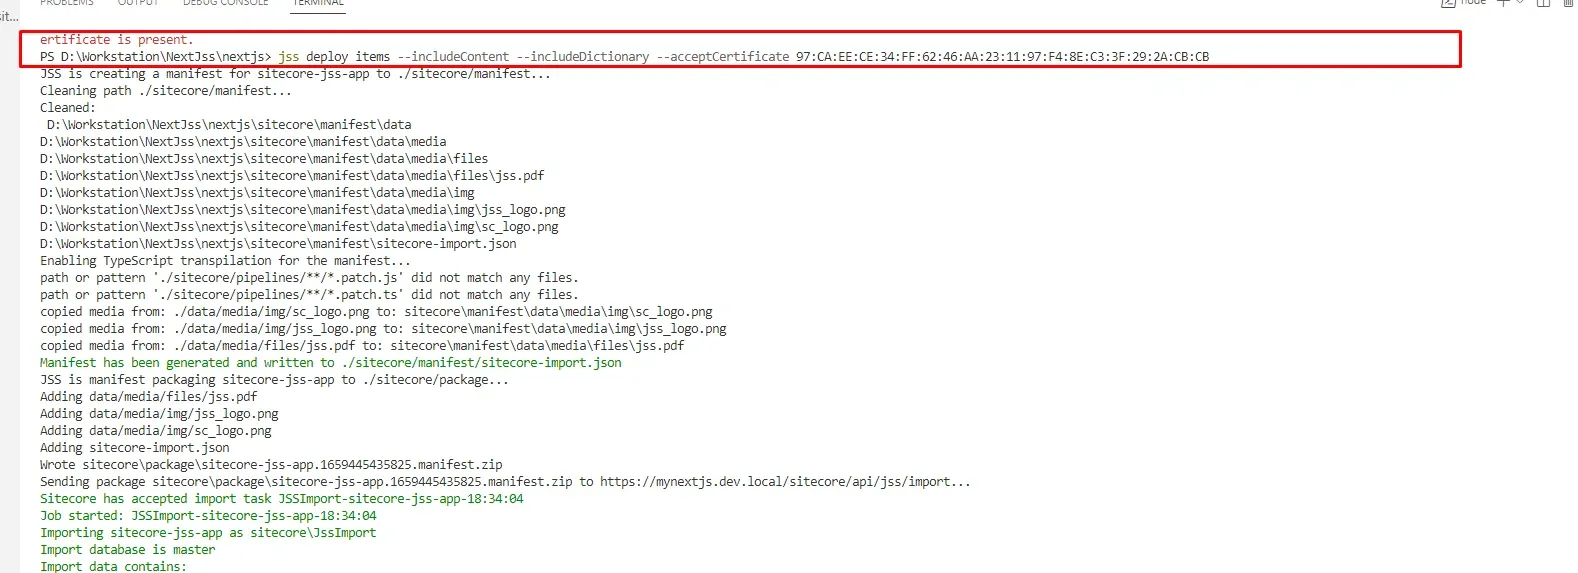

Now you can see a success message post successful import. And the components, templates, renderings, and pages are moved to the Sitecore root.
Now you can see the pages and components in Sitecore content editor /sitecore/content/sitecore-jss-app
Step: 6 Run the NextJs Application in connected mode
Now you need to open PowerShell in admin mode and go to the NextJs application root and run the below commands.
$env:NODE_TLS_REJECT_UNAUTHORIZED=0
jss start:connected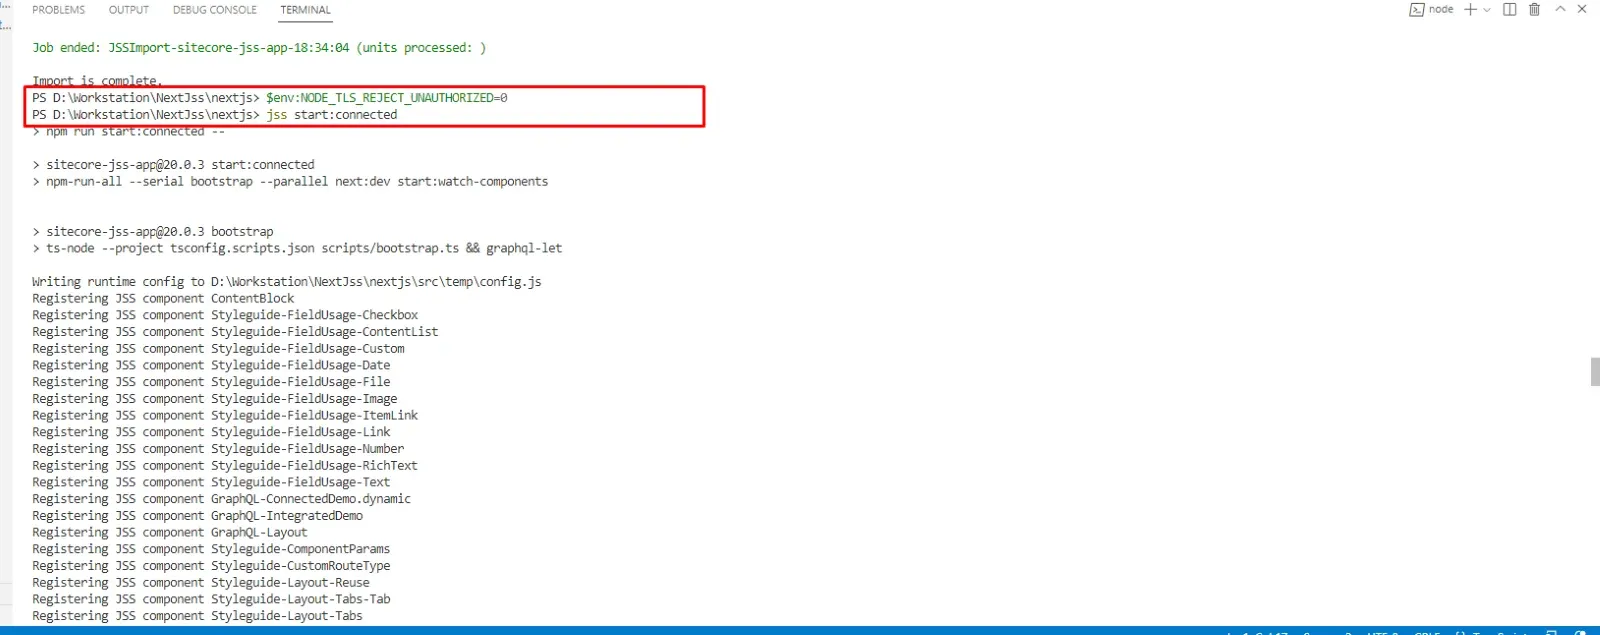
Waiting for the application to execute. Open your localhost on http:localhost:3000 again and the application is running in connected mode. Open your page in the Sitecore and Sitecore experience editor.
By following the above given steps and process, you will be able to setup the headless NextJS app even in the connected mode in Sitecore.
Facing any errors in this process
Error: 1 If you are facing an error to open the Sitecore experience editor follow this URL.

Mitesh Patel - Technical Head - ADDACT
Sitecore || XMCloud || OrderCloud Certified
Mitesh, a distinguished Technical Head at Addact/Addxp, is a prominent figure in Sitecore/XMCloud/OrderCloud certified writing. From Sitecore XM Cloud Developer Certification to Sitecore 10 .NET Developer Certification and Sitecore OrderCloud Certification, Mitesh's expertise is unparalleled. Mitesh is not only a skilled Sitecore CMS developer but also a 12+ years experienced software engineer proficient in various technologies such as MVC, ASP.Net, C#, jQuery, and Azure cloud/AWS.
