How to install and configure Sitecore CLI?
Published: 9 February 2023
Serialization is used to serialize an entire Sitecore database or sometimes a series of items in a database to the text files. You then have to use these text files for transferring this database, or a series of items in another database.
Typically, the Sitecore serialization is used in combination with a source control system to make it easier for the developers to sync the database changes between the local databases that they are using for development.
The source control system also keeps a track of the database changes and allows you a chance to compare the different changes within the database.
There are many tools available that provide Sitecore Serialization for content management in different types of machines and environments.
- TDS
- UNICORN
- SITECORE CLI
You have three serialization access points in Sitecore. They all use the same general settings in the App_Config\Sitecore\CMS.Core\Sitecore.Serialization.config file.
Below, we are going to discuss in detail the Sitecore CLI.
Sitecore CLI
The Sitecore Command Line Interface is a tool that you have to install in a terminal. You can install Sitecore CLI either as a local tool for your individual projects or as a global tool for all of the projects. It will not provide you with a user interface.
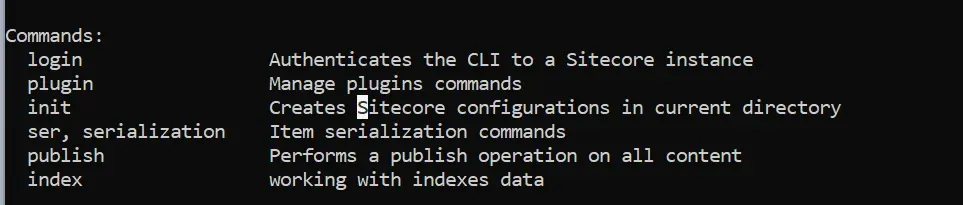
As suggested by the name itself, the Sitecore Command Line Interface is a command-line tool named Sitecore and you can add subcommands and options to it for accomplishing different tasks. The Sitecore CLI is a new tool created for improving the developers’ experience with the version Sitecore 10.
This tool can also specifically used with serializing Sitecore items, creating packagaes, and for publishing. No license is required for this, all you have to do is install it and you will be able to start using it.
A major advantage to this is that you can use these tools for fetching items from a Sitecore website on another environment. As a developer, we can more easily fetch the items from an acceptance environment. For example:
Sitecore CLI installation
Follow the below given steps for installation:
- If you have not already done CLI, install Sitecore Management Services.
- Open a terminal that comes with administrator privileges.
- Go to the project folder and then run the below commands
dotnet new tool-manifest
dotnet nuget add source -n Sitecore https://sitecore.myget.org/F/sc-packages/api/v3/index.json
dotnet tool install Sitecore.CLI
To initialize your new project, run the following command in your project folder:
dotnet sitecore init
Install the required Publishing and Serialization plugins:
dotnet sitecore plugin add -n Sitecore.DevEx.Extensibility.Serialization
dotnet sitecore plugin add -n Sitecore.DevEx.Extensibility.Publishing
To verify that the Sitecore CLI works, go to your project folder in a terminal and type
dotnet Sitecore –version

Currently I am using 4.2.0.
To make use of the Sitecore CLI, login is required and there are two ways through which you can verify the user:
- Using an interactive user login
- Using a non-interactive client login
1) Use an interactive user login
Please run the below commands in the console:
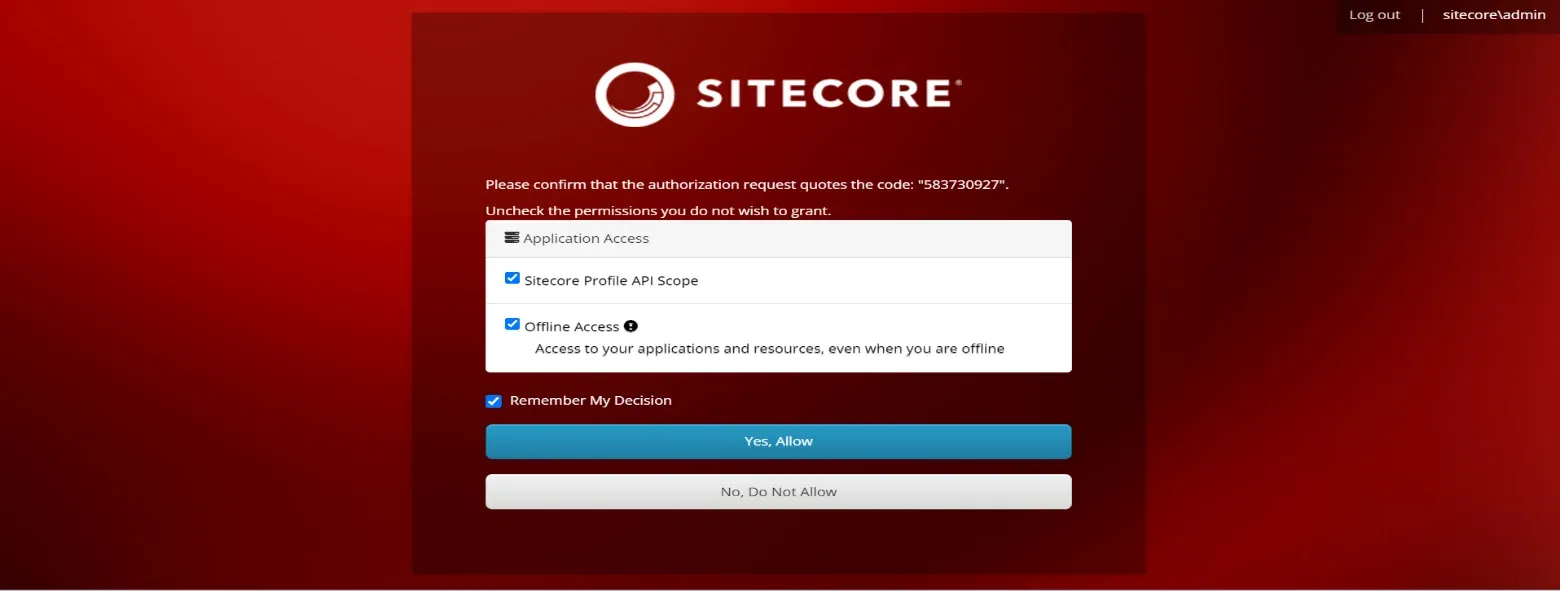
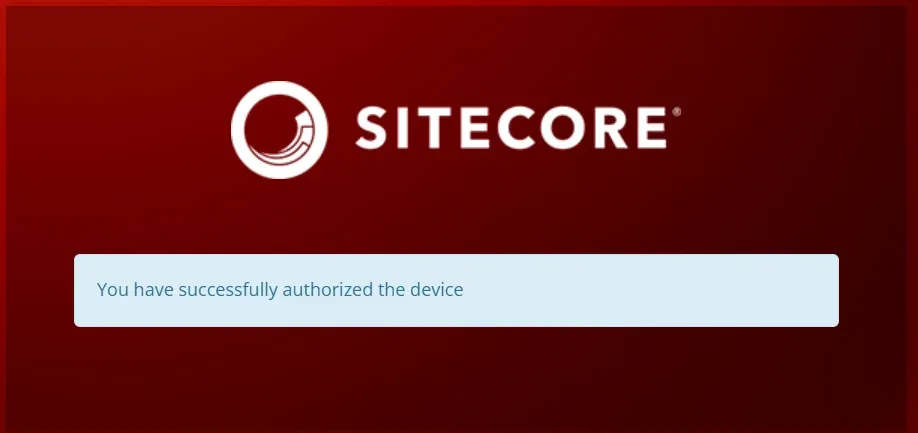
Command: dotnet Sitecore login –authority https://<Sitecore identity server> –cm http:// <Sitecore instance> –allow-write true
Once you fire up the above given command, it will open up a login screen in the browser.

2) Use a non-interactive client login
To enable the non-interactive client login using the client credential flows with your Sitecore instance, you must add the additional configurations to your identity server and to the content management instances.
To configure a non-interactive client login:
On the Sitecore Identity Server, in the Config/folder, create a new file named Sitecore.IdentityServer.DevEx.xml containing the following:

- Name the <CliServerClient> element anything that you want.
- In the <ClientId> element, enter the unique ID of your client.
- In the <ClientSecrets> element, create a <ClientSecret1> element containing the secret of your client.
- Now save the Sitecore.IdenityServer.DevEx.xml file.
On the Sitecore Content Management server, in the App_Config/Include/ folder, create a file named Sitecore.Owin.Authentication.ClientCredentialsMapping.config that contains the following:
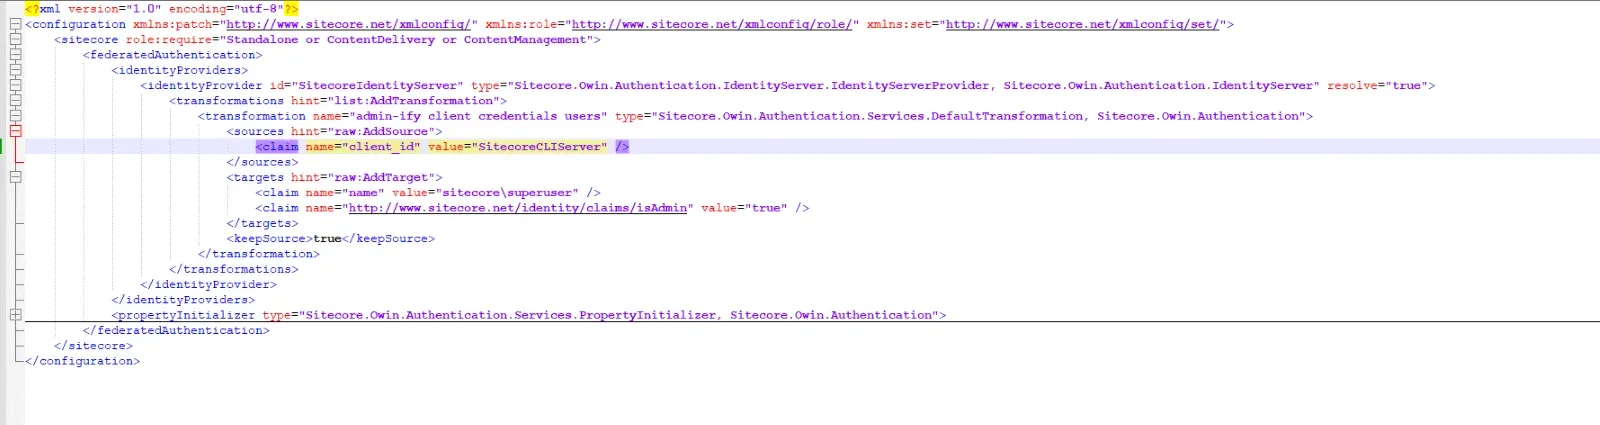
- In the <claim name="client_id"> element, in the value attribute, enter the unique ID of your client.
Check your SQL Membership provider in the web.config file. If the solution has the requiresUniqueEmail attribute set to true, add the following configuration line to the Sitecore.Owin.Authentication.ClientCredentialsMapping.config file:

- Save the Sitecore.Owin.Authentication.ClientCredentialsMapping.config file.
- Restart the Sitecore Identity Server and the Content Management roles.
- Recycle the Sitecore Identity Server application pool.
Validate your configuration by performing the client login procedure.
Command: dotnet sitecore login --authority https://<sitecore-identity-server> --cm http://<sitecore-instance> --allow-write true --client-credentials true --client-id <client-id> --client-secret <client-secret
After login, you are ready to serialize (push, pull) and publish the database via the below commands.
Conclusion
For serializing any Sitecore items, you can install and configure Sitecore CLI by following the above-given steps.

Maulik Dudharejia - Co-Founder & CMO - ADDACT
Sitecore MVP 3X || Digital Transformation Strategist || Marketer
Maulik Dudharejia is a visionary author, co-founder, Chief Marketing Officer, and a digital transformation expert with over 12+ years' of experience. He leverages industry certifications to translate complex tech concepts into engaging writing. His areas of expertise include Sitecore, IoT, and IT Service Management. Maulik offers valuable insights and strategies to help readers navigate the evolving tech landscape.