How to configure SOLR cores in Sitecore SXA?
Published: 24 July 2023

Sitecore Experience Accelerator (SXA) is a framework that helps you create websites faster and easier with Sitecore. SXA provides a set of reusable components, templates, layouts, and themes that you can use to build your site without writing any code.
It also supports multisite and multilingual and allows you to edit your website in the Experience Editor.
SXA uses Solr as the default search engine and provides a set of search components that you can add to your website. For adding SOLR core to the SXA website please refer below steps.
- Add SXA specific Solr cores.
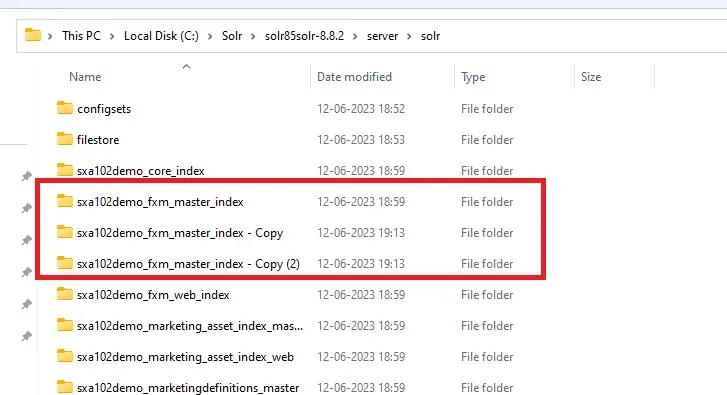
- Goto “C:\Solr\solr85solr-8.8.2\server\solr” and copy twice “{YourSitecoreInstanceName}_master_index” folder.
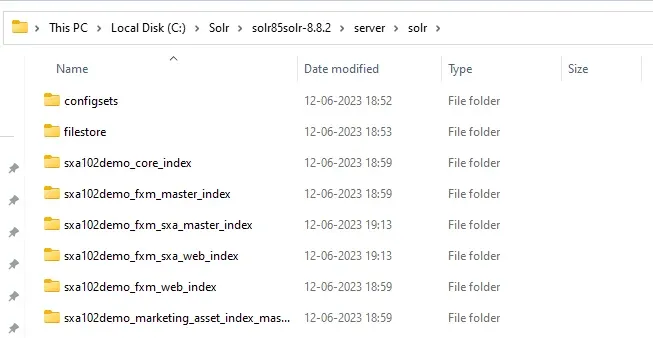
- Then, rename new folders as follows “{SitecoreInstanceName}_sxa_master_index” and “{SitecoreInstanceName}_sxa_web_index”:
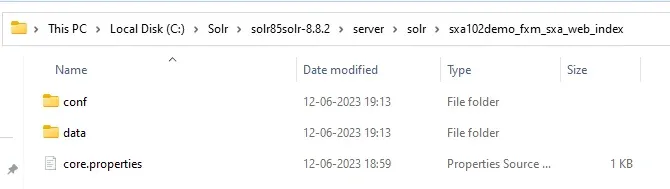
- Navigate to both folders and remove data folder and core.properties file as shown below:
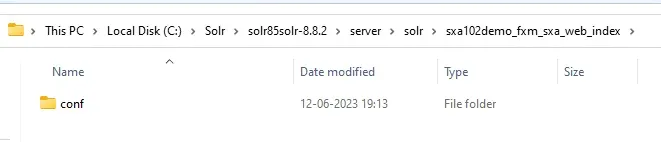
- Only conf folder should be left in both newly created folders as below:
- Open Solr portal in your browser.
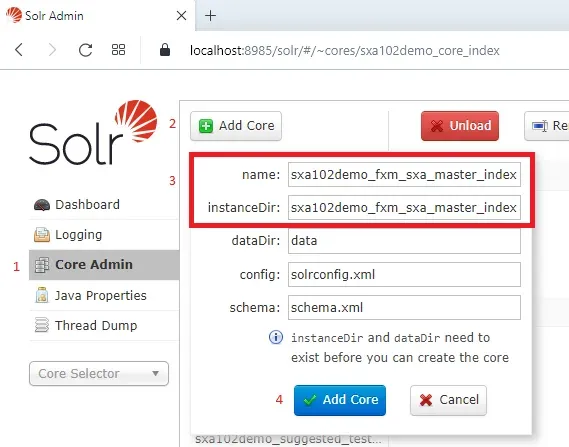
- Click on Core admin found in the left menu -> Add Core -> Specify your Site instance name “{YourSitecoreInstanceName}_sxa_master_index” in name and instanceDir fields -> hit Add Core button:
- Repeat step 7 for “{YourSitecoreInstanceName}_sxa_web_index” as well.
- Goto “C:\inetpub\wwwroot\sxa102demosc.dev.local\App_Config\Modules\SXA\z.Foundation.Overrides” file (paths can vary based on your installation process) and change core parameters highlighted below to your created Solr cores:

To prevent config files issues, it’s better practice to create a patch config file and not to edit the config files directly.
Once above settings is done then restart your CMS application and follow below steps in CMS.
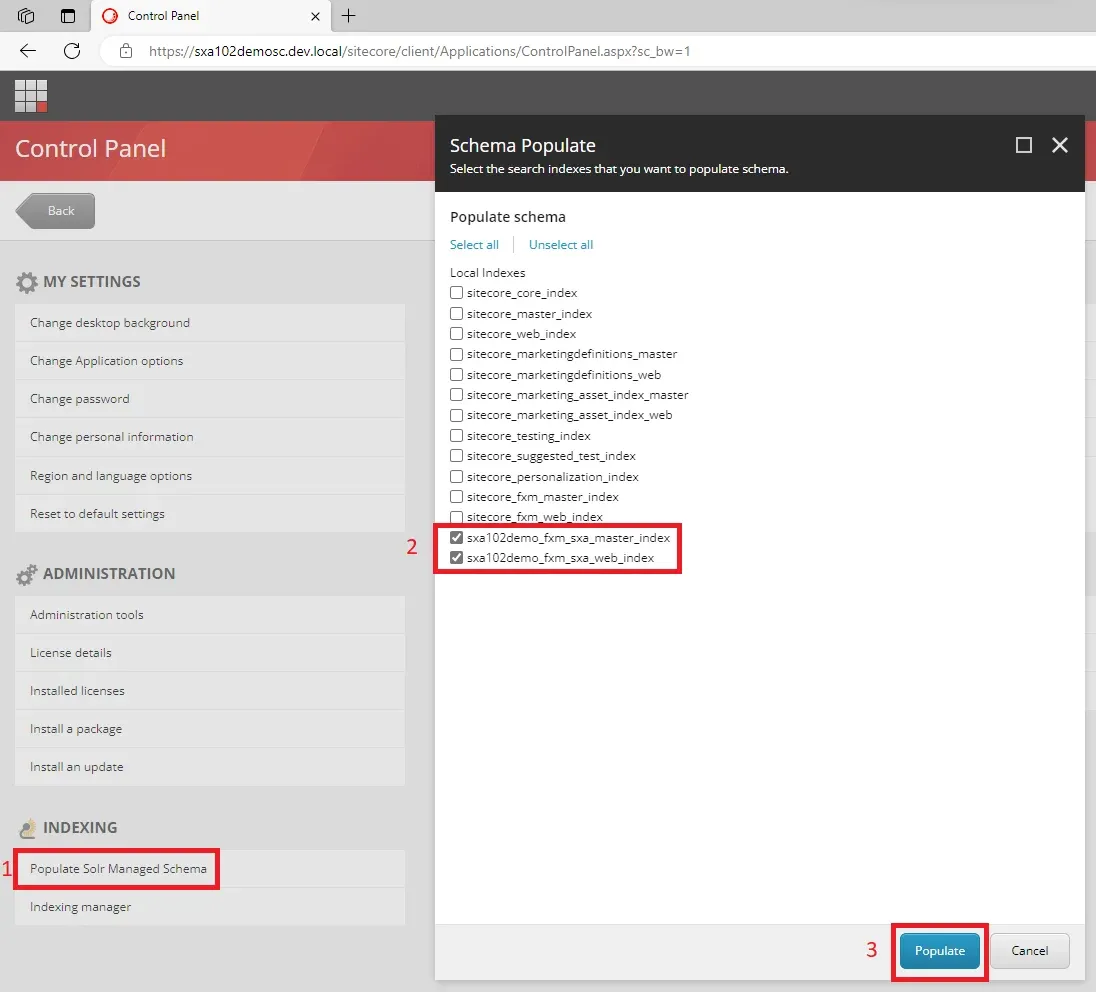
Populate Solr Managed Schema for SXA indexes:
- From the Launchpad, open the Control panel.
- Open Populate Solr Managed Schema -> select SXA related indexes as shown below and -> click Populate button.
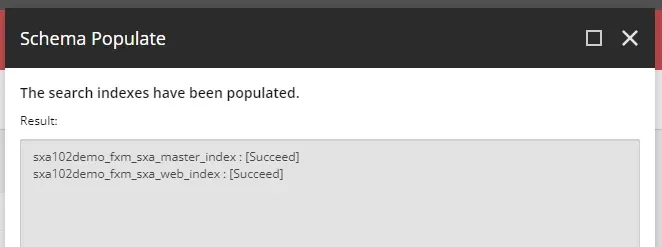
- The Output should be as follows:
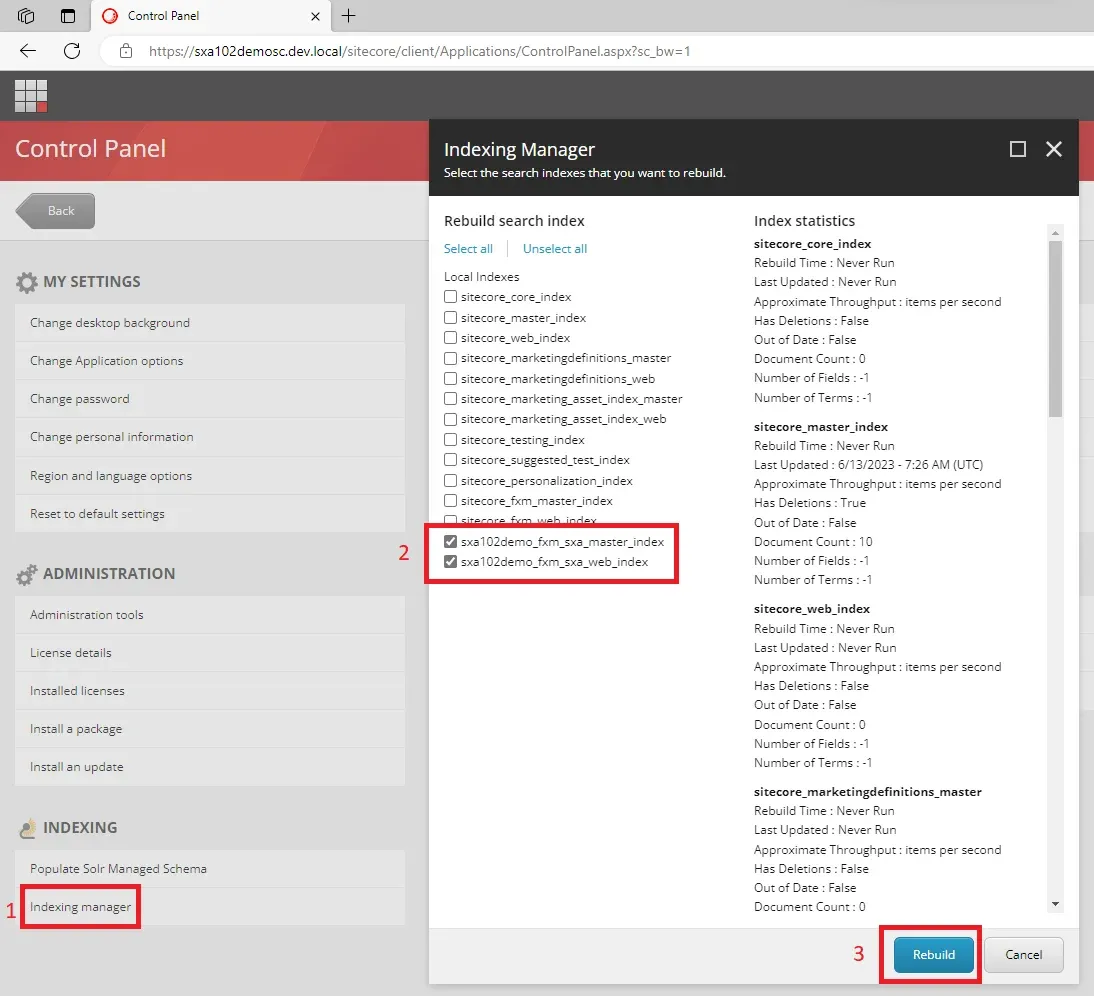
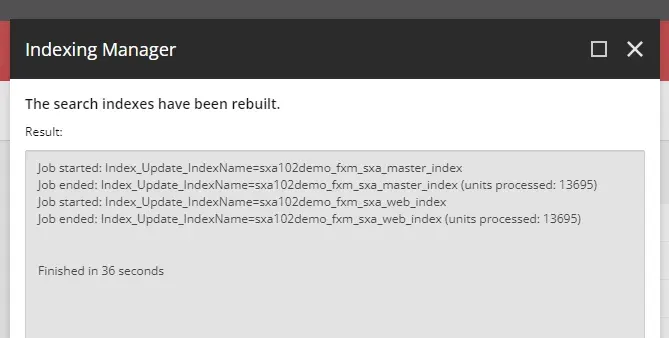
Rebuild the indexes:
- Open Control panel from the Launchpad.
- Open Indexing manager from Indexing section -> select SXA related indexes as shown below and -> click Rebuild button:
- The Output should be as follows:
Sitecore Experience Accelerator has been successfully installed in Sitecore 10.2, you can start Content editing after adding/creating a tenant and a site.

Maulik Dudharejia - Co-Founder & CMO - ADDACT
Sitecore MVP 3X || Digital Transformation Strategist || Marketer
Maulik Dudharejia is a visionary author, co-founder, Chief Marketing Officer, and a digital transformation expert with over 12+ years' of experience. He leverages industry certifications to translate complex tech concepts into engaging writing. His areas of expertise include Sitecore, IoT, and IT Service Management. Maulik offers valuable insights and strategies to help readers navigate the evolving tech landscape.