Sitecore Content Hub (DAM) Setup & Integration with Sitecore 10.2 XP/XM
Published: 17 April 2022
Sitecore Connect for content hub used to integrate Sitecore Content Hub to Sitecore XP or XM.
DAM stands for Digital Asset Management & DAM Module is used to interact with assets created in Content Hub inside Sitecore XP/XM. We can upload, search and insert assets from DAM directly from within Sitecore Content Editor or Experience Editor.
The Sitecore Connect for Sitecore Content Hub (DAM) Installation in Sitecore XP/XM can be done via two ways:
- Installing “Sitecore Connect for Sitecore DAM” package in Sitecore using Sitecore Packages Functionality
- Running PowerShell Script from “Sitecore Connect™ for Content Hub SIF Package”
We are going to use Script Approach in this blog. Let us see the steps for the Setup & Integration:
PRE-REQUISITES :
- Sitecore XP or XM 10.2 Instance (https://dev.sitecore.net/Downloads/Sitecore_Experience_Platform/102/Sitecore_Experience_Platform_102.aspx)
- Access to Sitecore Content Hub 4.0 (To get sandbox access, send email to (sl-training@sitecore.com. So you will get one month access to explore content hub.)
- ‘Sitecore Connect™ for Content Hub SIF Package’ & ‘Sitecore Connect™ for Content Hub WDP Package’ (Download from here: https://dev.sitecore.net/Downloads/Sitecore_Connect_for_Content_Hub/5x/Sitecore_Connect_for_Content_Hub_500.aspx)
SITECORE CONNECT INSTALLATION IN SITECORE INSTANCE :
- Download ‘Sitecore Connect™ for Content Hub WDP Package’
- Download, Unzip ‘Sitecore Connect™ for Content Hub SIF Package’ and open the ‘deploy.ps1’ PowerShell script in Notepad++
- Change the below parameters in the Script as per our configurations:
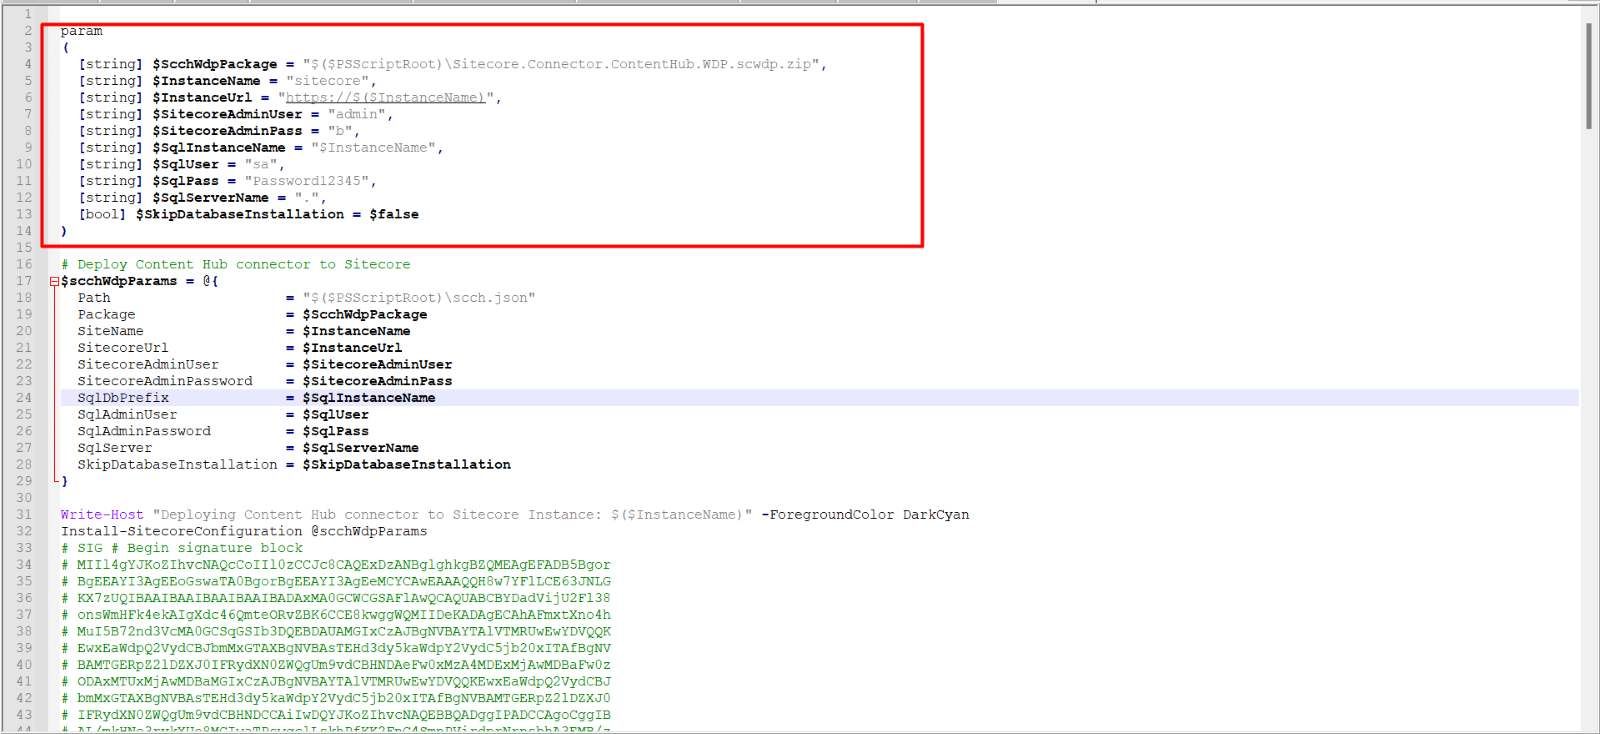
Parameter Details:
- ScchWdpPackage = ‘Sitecore Connect™ for Content Hub WDP Package’ Package path including zip package name & extension type
- InstanceName = Check the Sitecore Instance name from IIS
- InstanceUrl = Sitecore Instance URL
- SitecoreAdminUser = Sitecore admin username
- SitecoreAdminPass = Sitecore admin username password (“b”)
- SqlInstanceName = Core Db name from Sitecore instance connection string
- SqlUser = Sql server username where Sitecore instance Db’s are placed (usually in sa)
- SqlPass = Sql server password
- SqlServerName = Sql server name
- SkipDatabaseInstallation = set to $true
Refer the below image for better understanding of parameter details: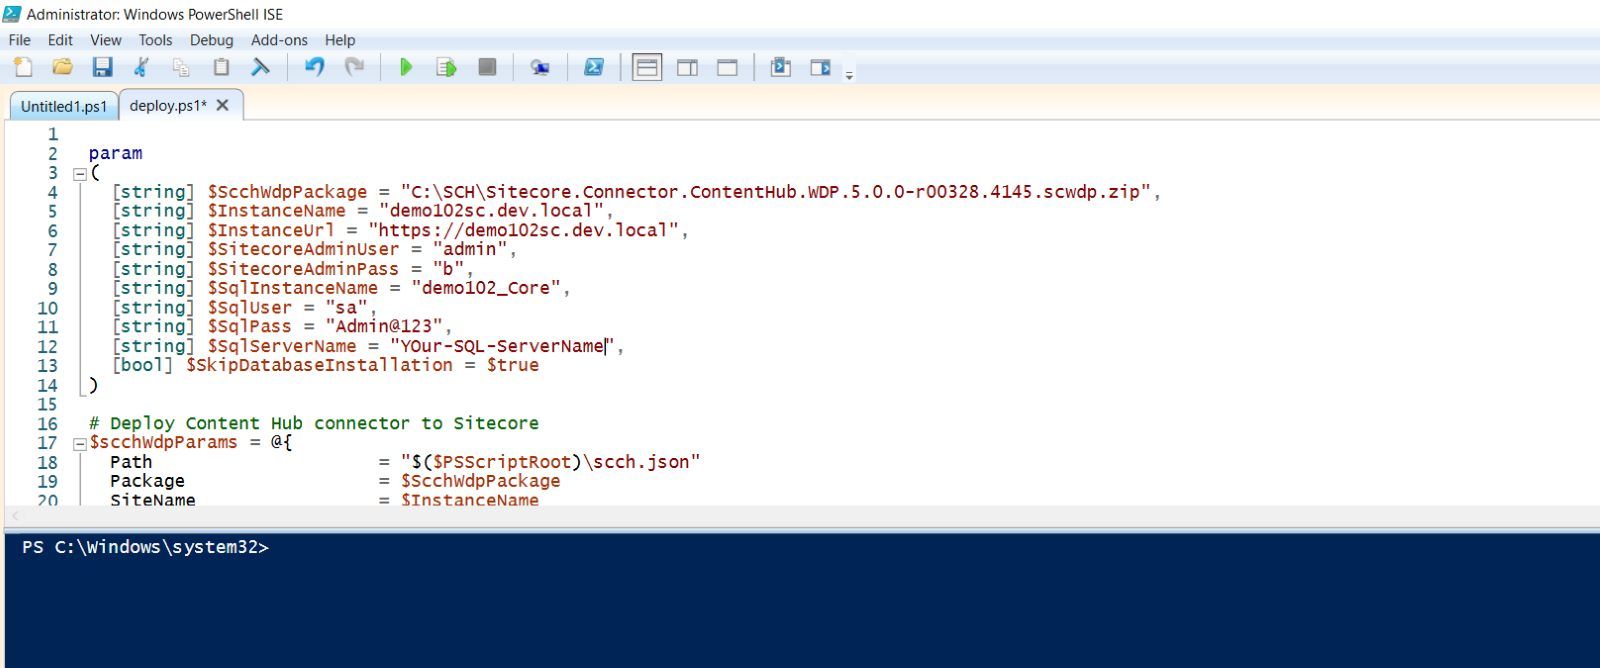
Finally, execute the script into PowerShell (run as administrator) and we are done with the installation.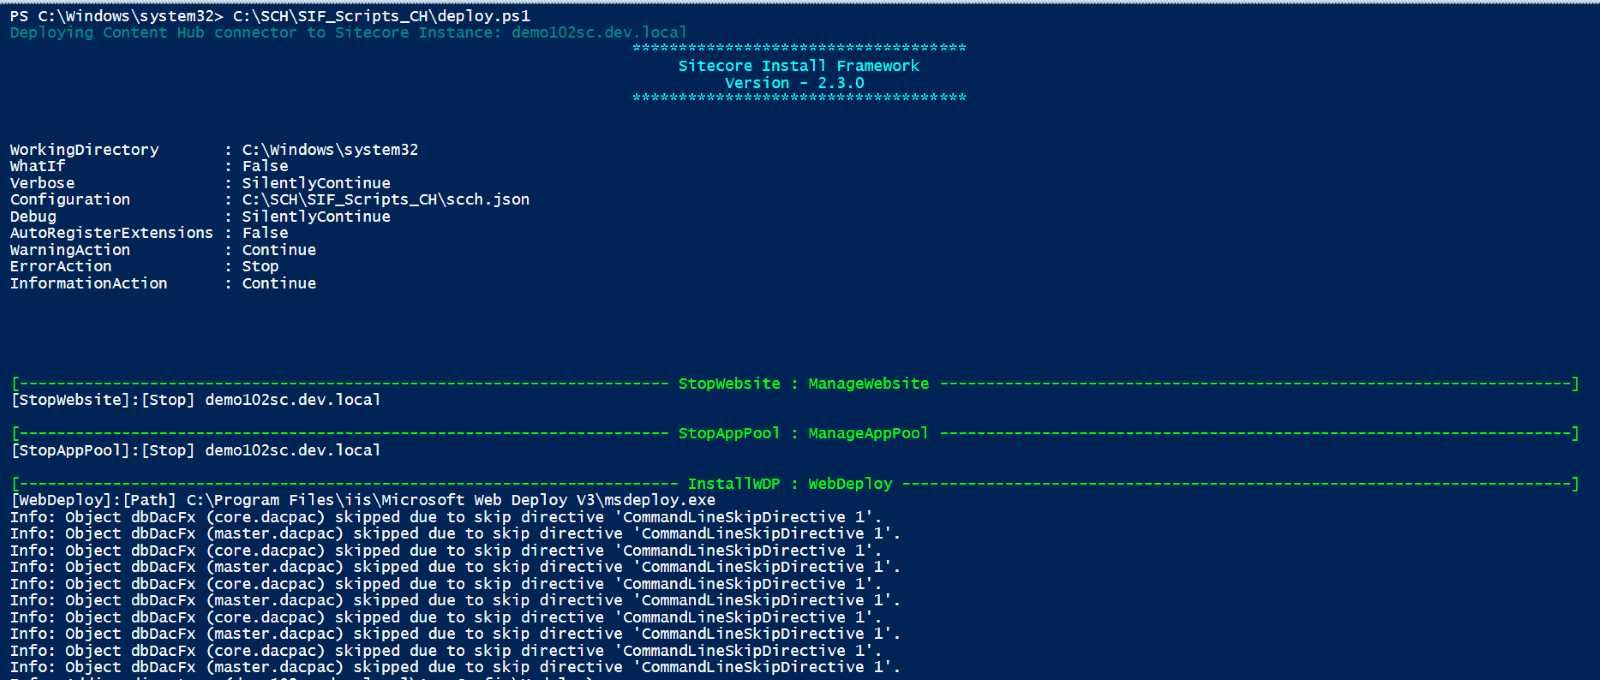
INTEGRATION CONFIGURATIONS :
Once you get the access from Sitecore, using your Sitecore portal credentials you will be able to login to the content hub portal. Please refer below steps for configuration.
- Content Hub Configurations:
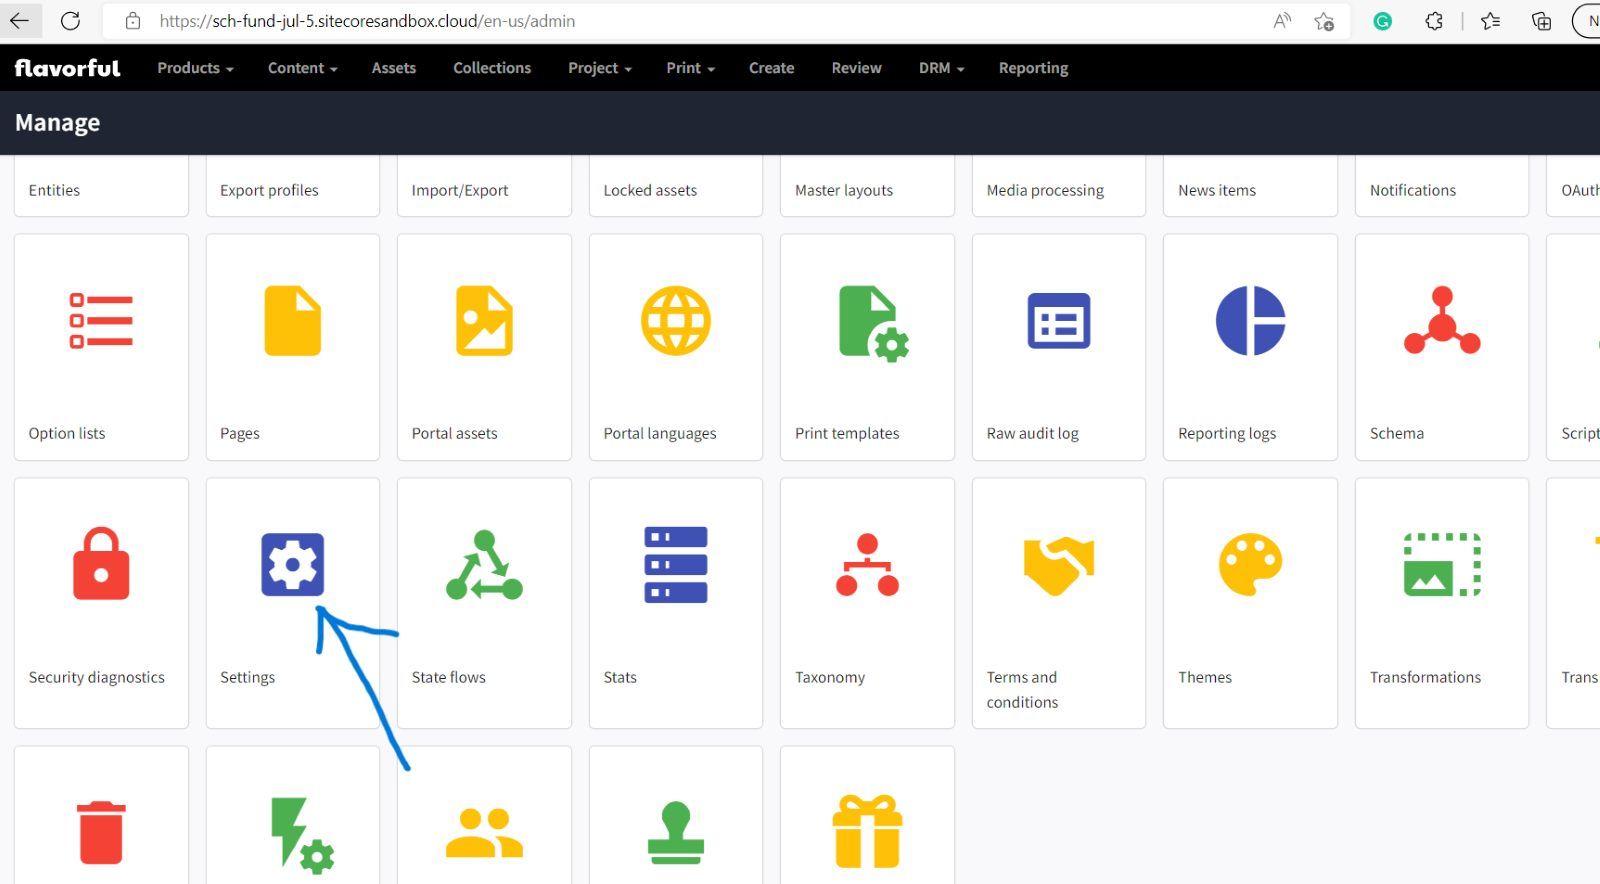
- Login into Content Hub & Open Manage
- Click Settings
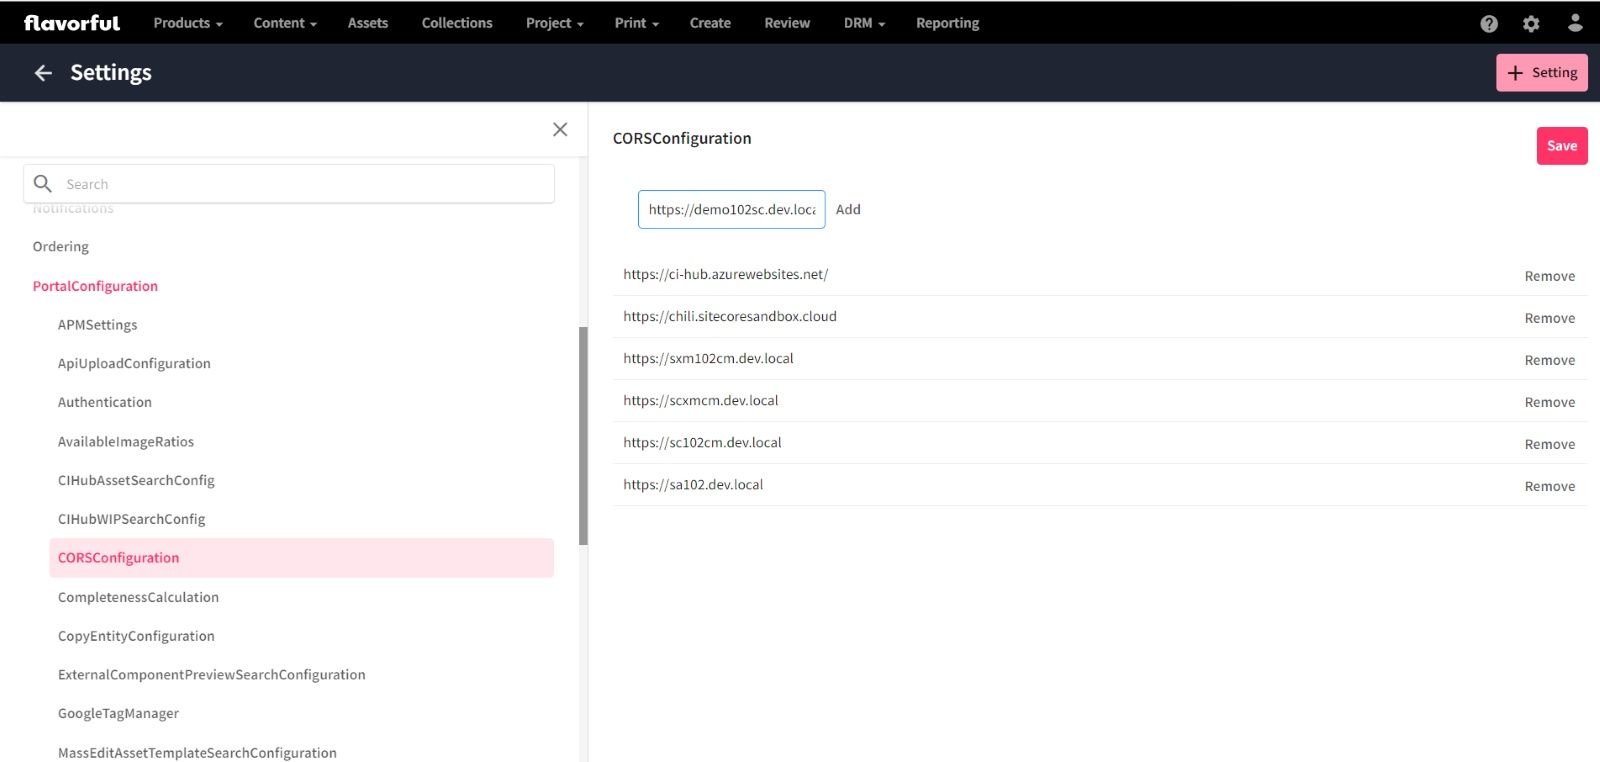
- Add Sitecore URL to the CORSConfiguration Under PortalConfiguration & Save the Changes (Note: Try to avoid the end slash ‘/’ in the URL)
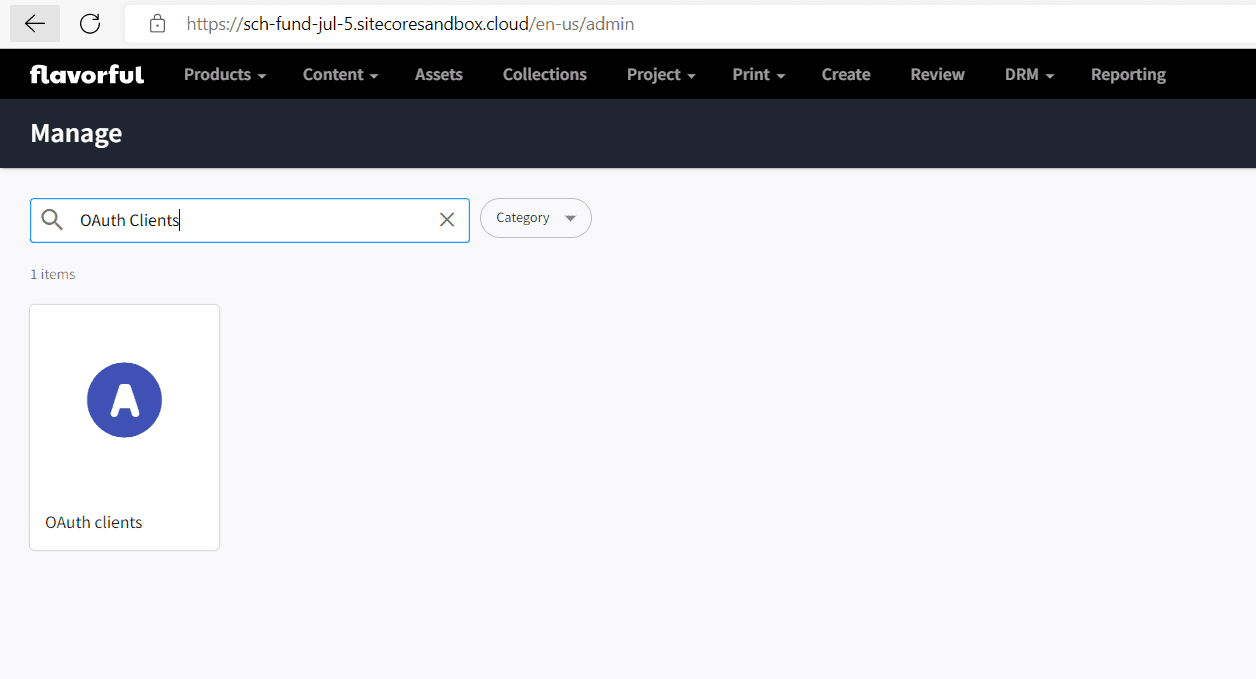
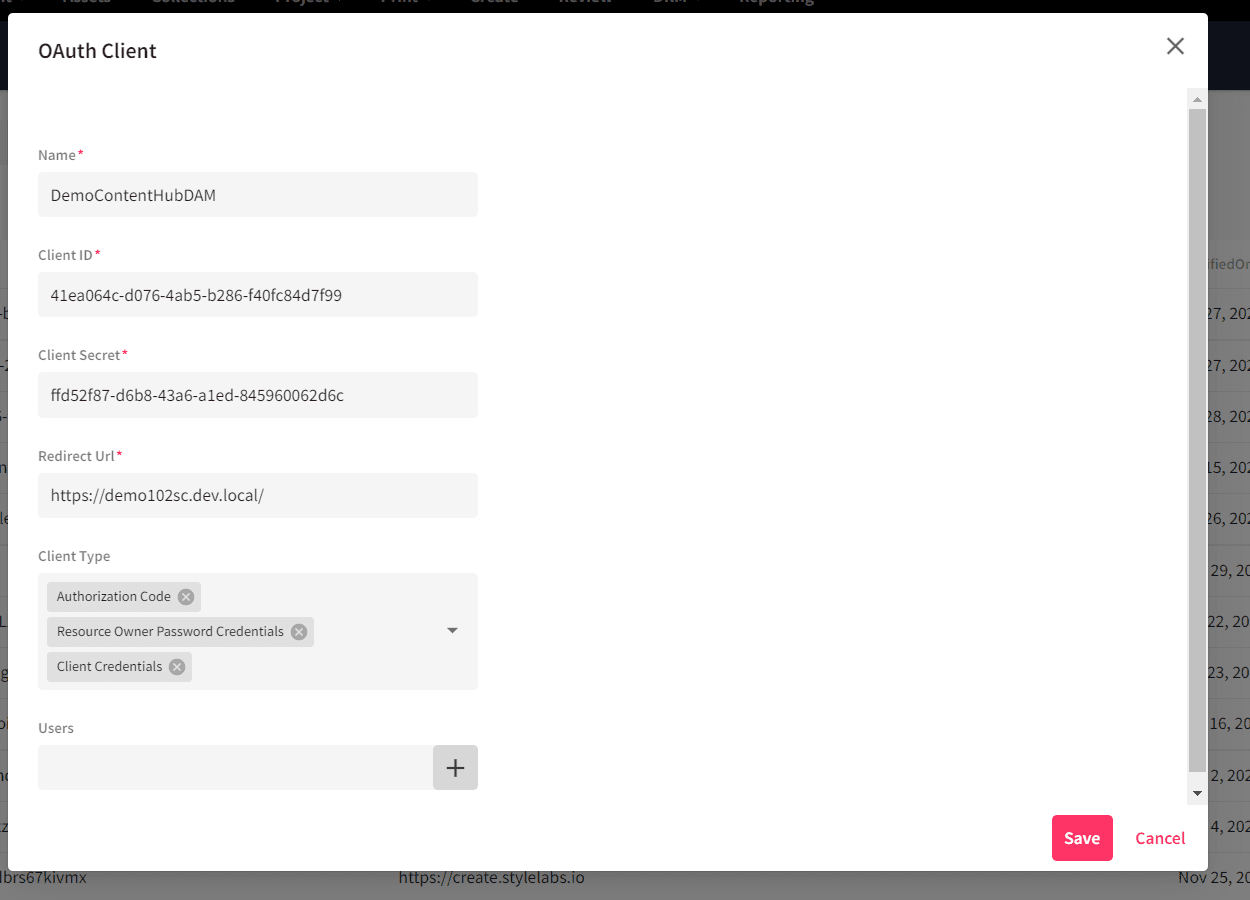
- Open OAuth clients from the Manage panel only
- Click on + OAuth Client

- Fill up the parameters and save the changes Parameter Details:
- Client Id and Client Secret are custom defined values and for this we can add any Guide values (take note of client id & secret somewhere)
- Select all Options for client Type
- Login into Content Hub & Open Manage
- Sitecore Configurations:
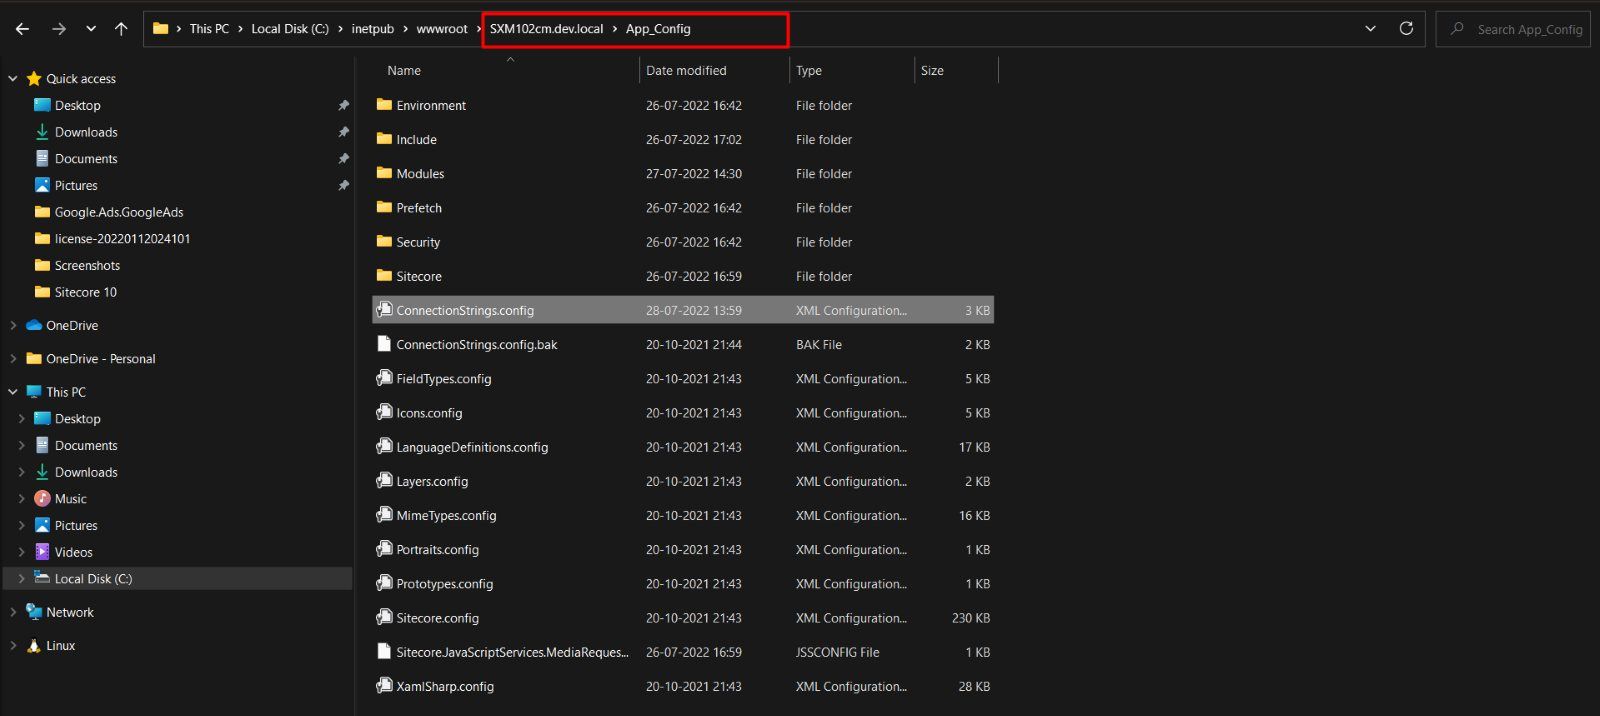
- Open Sitecore instance Connection String in Notepad++ (probably at path ‘\App_Config\ConnectionStrings.config’ in our Sitecore IIS website folder)
- Modify connection string for ‘DAM.ContentHub’ for all the attributes as detailed

- Modify connection string for ‘DAM.SearchPage’ and fill up the Search Page details. The Search page can be found under Content Hub > Manage > Pages > Sitecore DAM connect > Approved assets

- Now open Sitecore ‘web.config’ file and modify Content-Security-Policy by Appending below value to the existing values: “upgrade-insecure-requests; block-all-mixed-content; upgrade-insecure-requests; block-all-mixed-content; child-src 'self' https://{ContentHubUrl}/; connect-src 'self' https://{ContentHubUrl}/; media-src https://{ContentHubUrl}/;”
- Refer below image post updating in the parameter:

- Open Sitecore instance Connection String in Notepad++ (probably at path ‘\App_Config\ConnectionStrings.config’ in our Sitecore IIS website folder)
HOW TO ACCESS DAM IN SITECORE :
Once done with the installation and all the configurations, restart your Sitecore Instance and recycle App Pool in IIS.
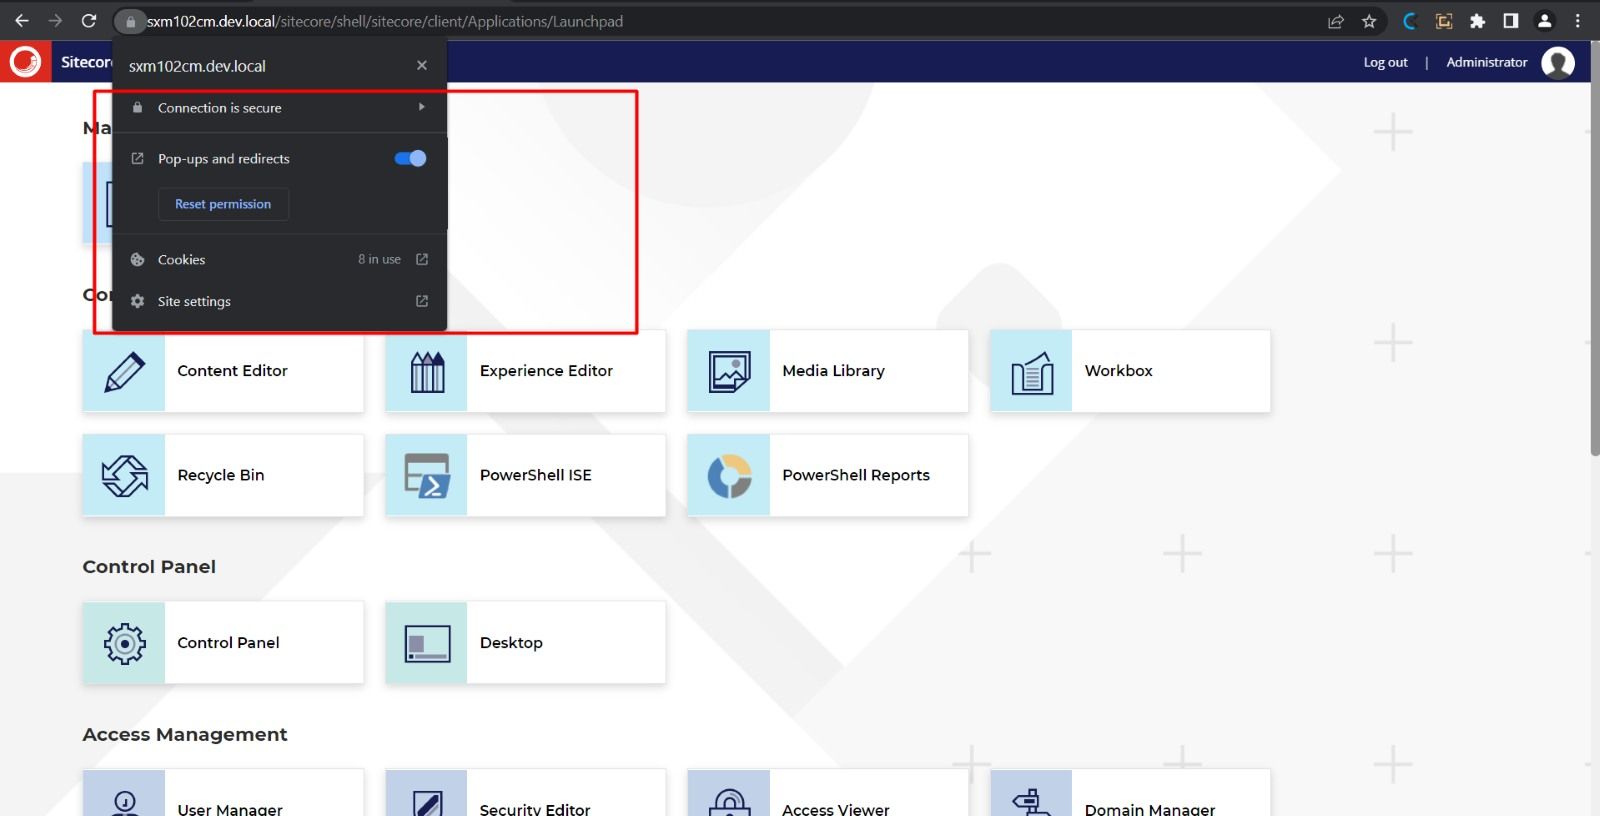
Now, Access Sitecore CMS and make sure you enable pop-ups for Sitecore in the browser. Refer image for example:
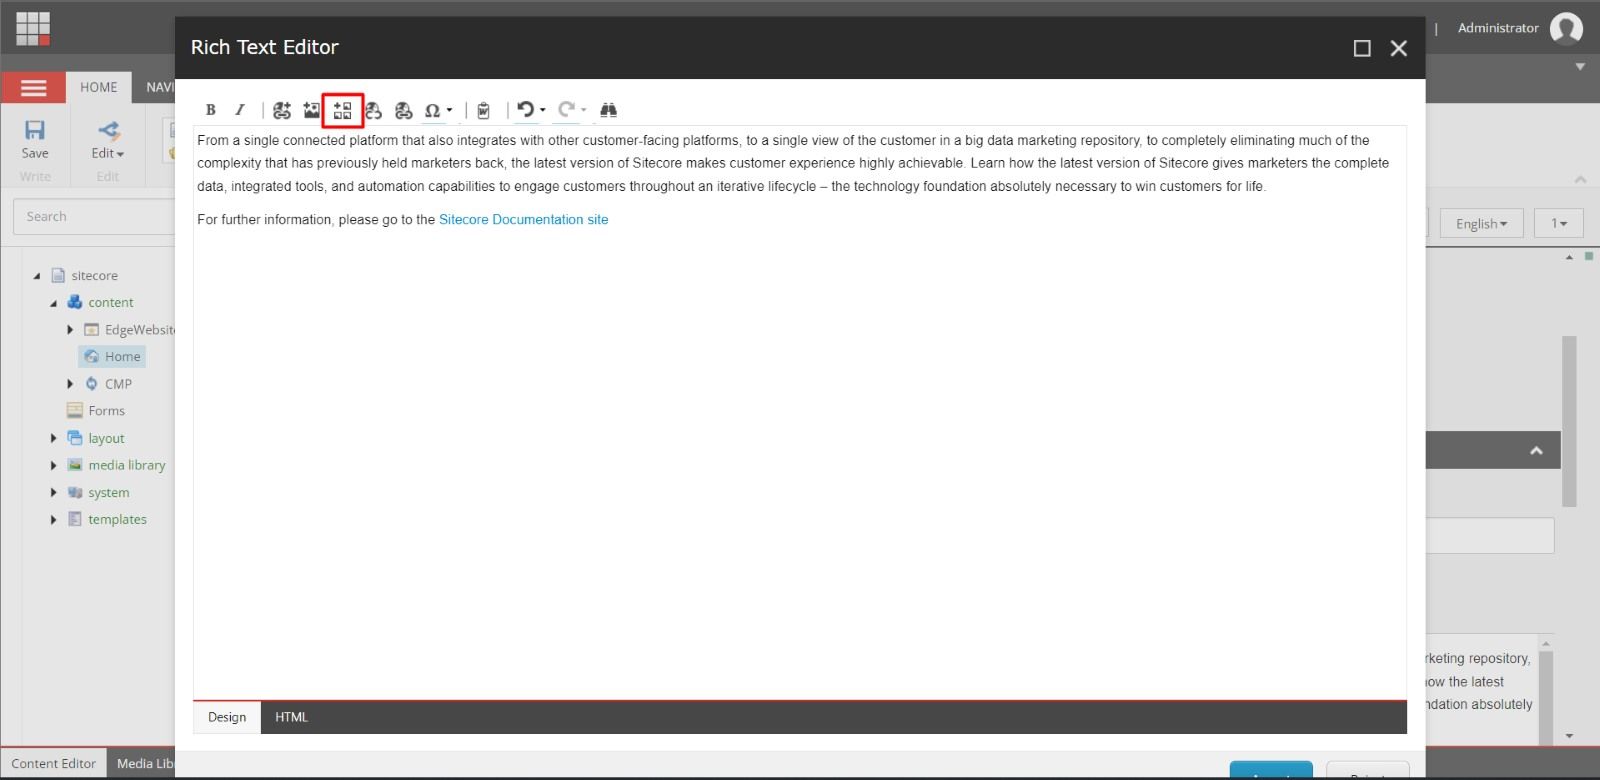
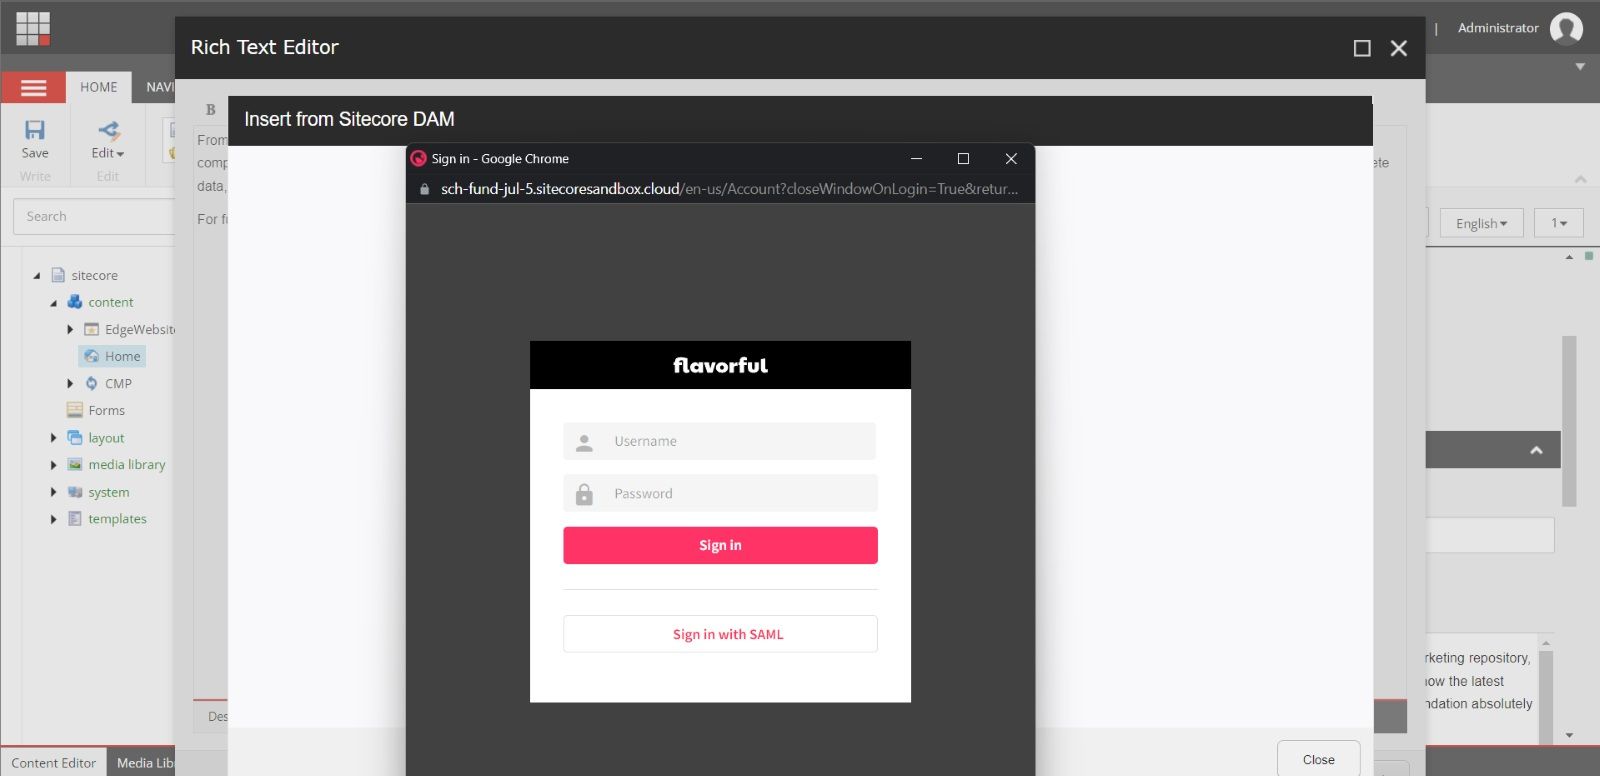
- Open any page/item Rich Text Editor then click Show Editor you will find the Insert from Sitecore Dam icon
- Click on the Icon then login popup window occurs for content hub. Do login with your credentials.
- Once login is successful, it’ll now open the DAM search page
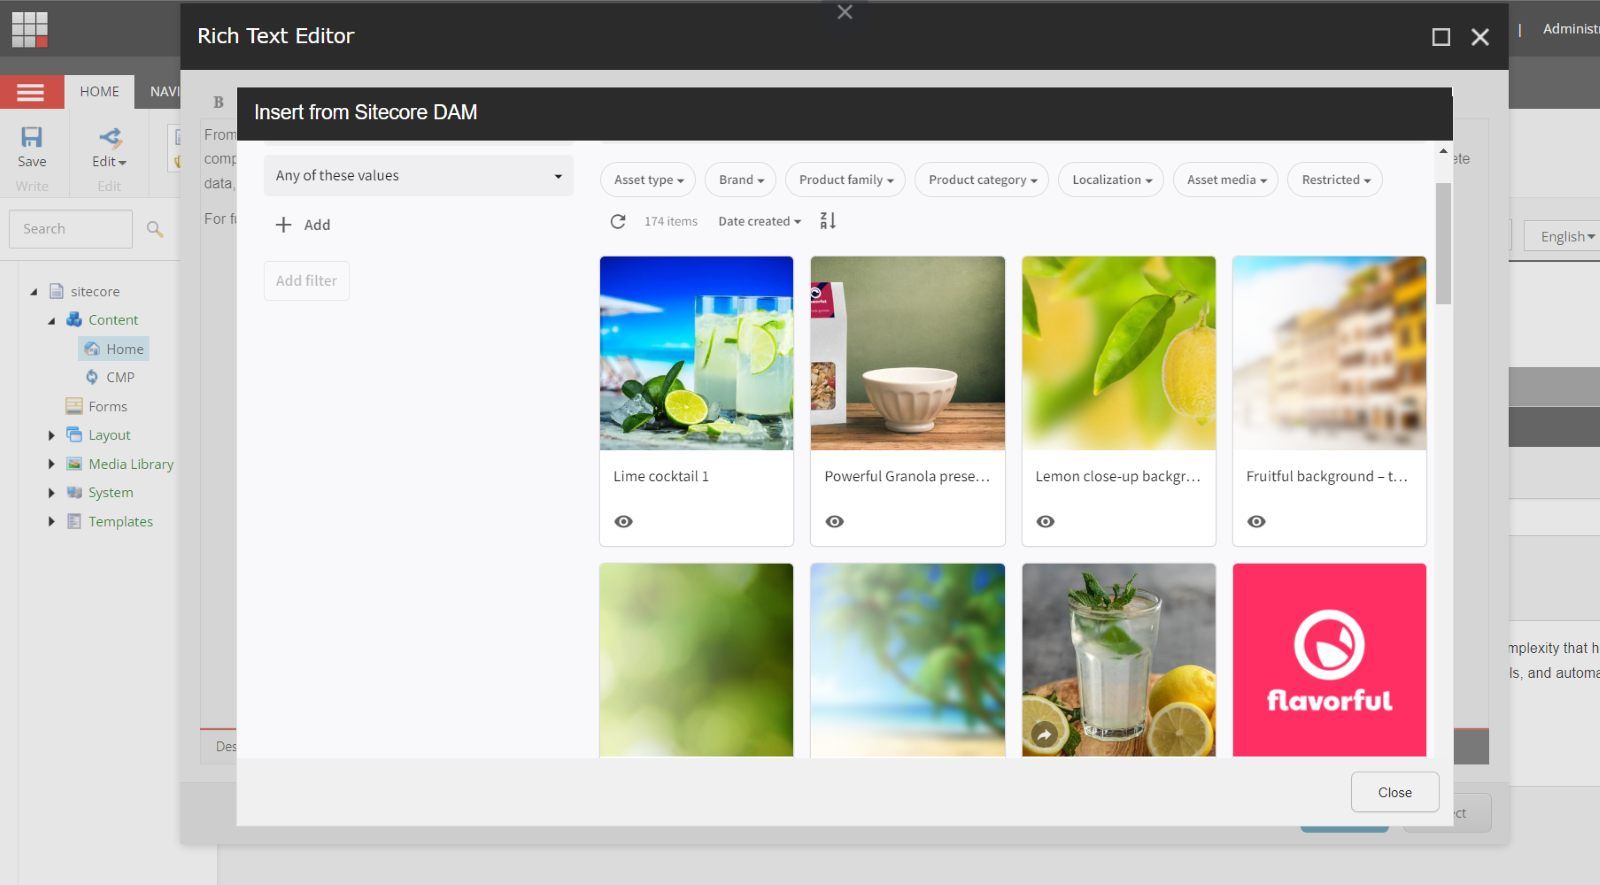
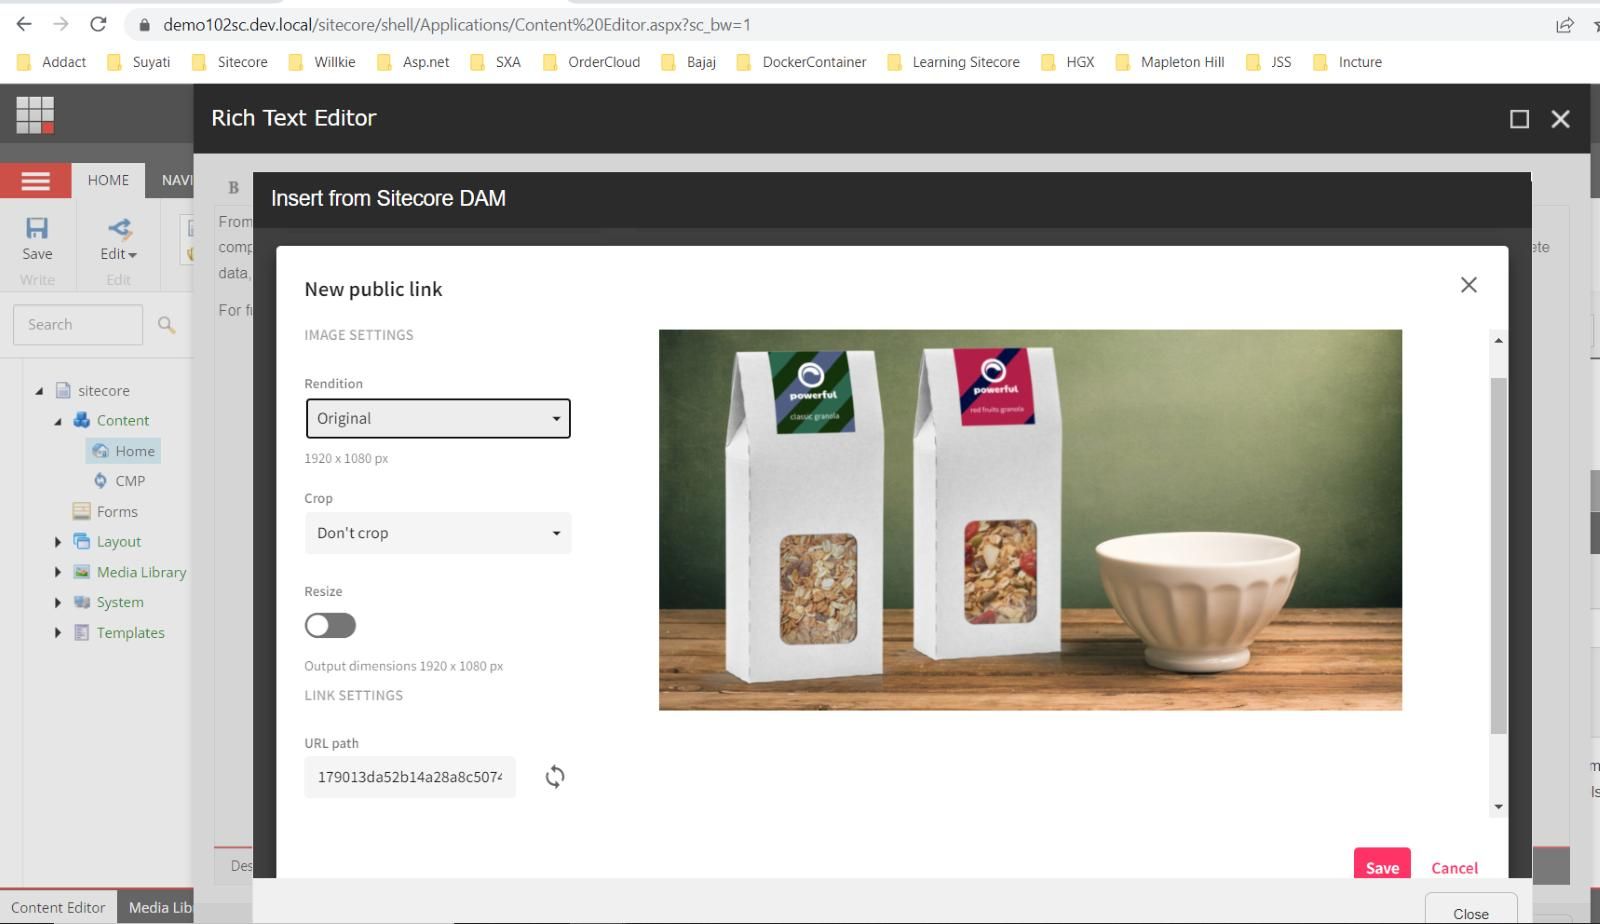
- Select the image you want to insert and select your options then click Save
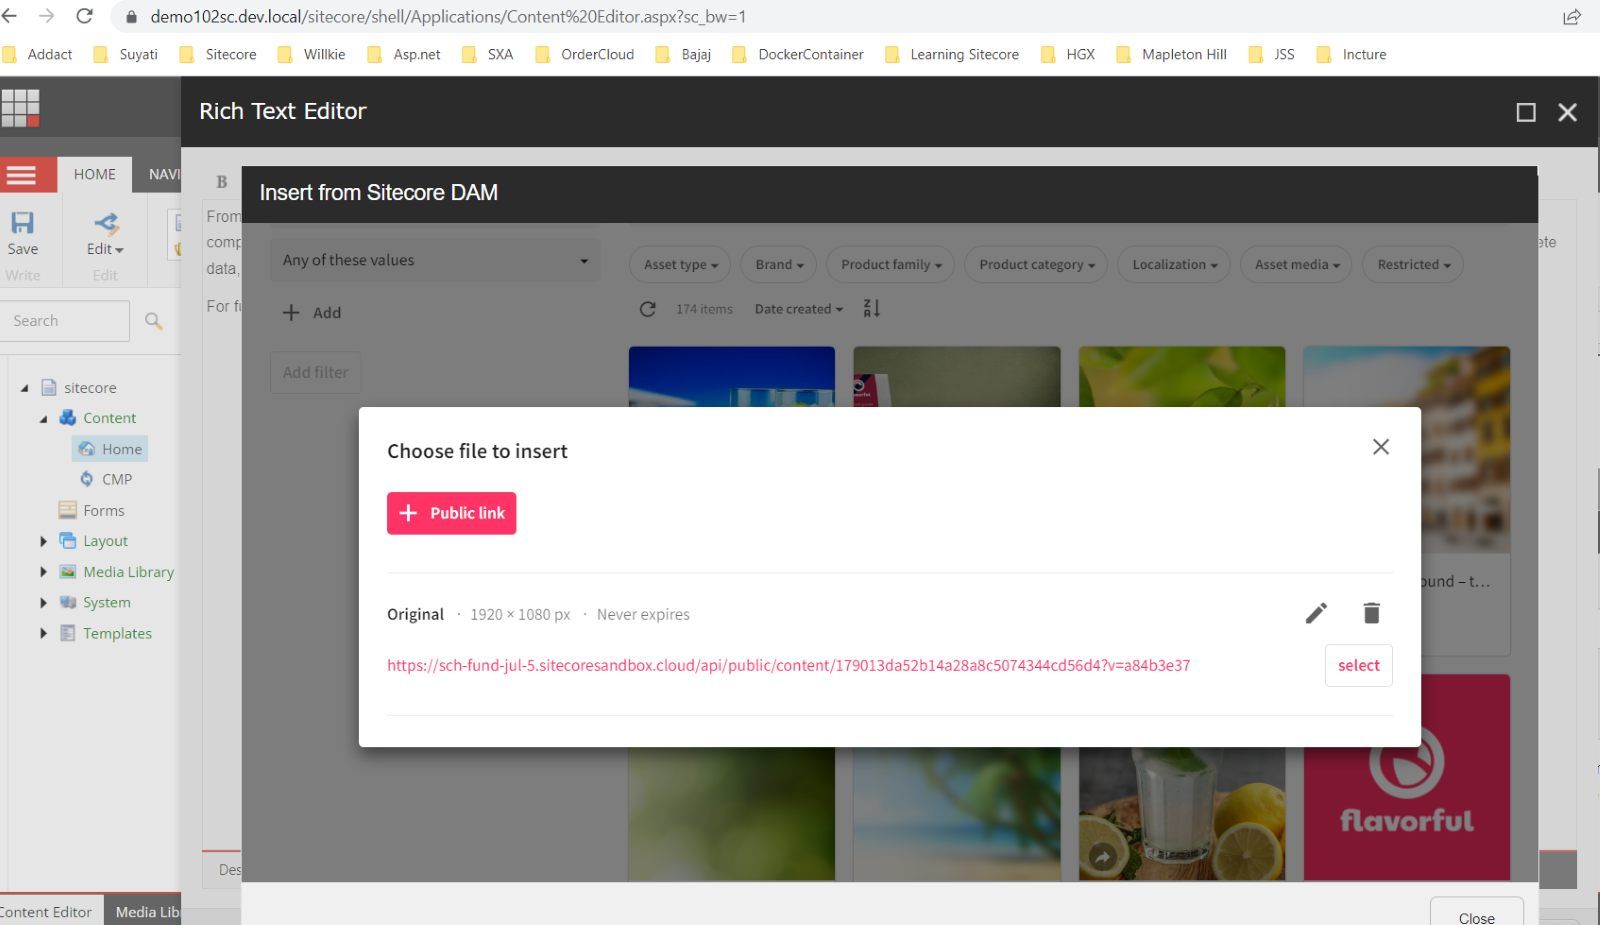
- Now, Sitecore will generate a public link for the asset you selected. Once the link is generated click Select
- Save the Rich Text Content and Close the editor. Open the page in experience editor or in preview mode to view the added image
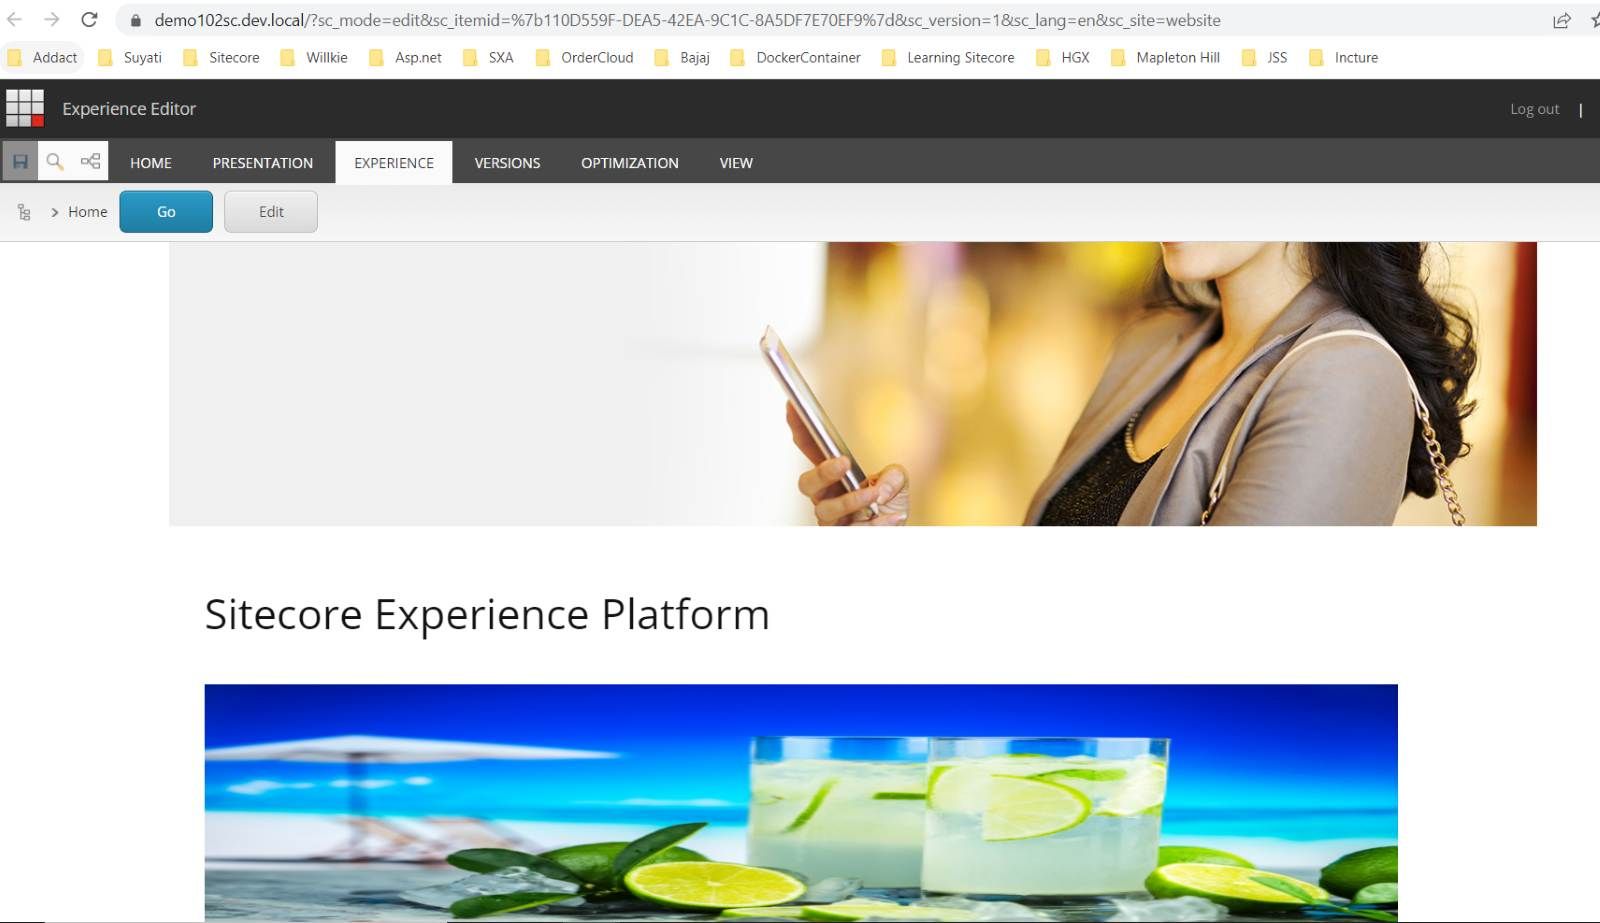
If the added image is visible on the page. We are done with the Integration of DAM.

Mitesh Patel - Technical Head - ADDACT
Sitecore || XMCloud || OrderCloud Certified
Mitesh, a distinguished Technical Head at Addact/Addxp, is a prominent figure in Sitecore/XMCloud/OrderCloud certified writing. From Sitecore XM Cloud Developer Certification to Sitecore 10 .NET Developer Certification and Sitecore OrderCloud Certification, Mitesh's expertise is unparalleled. Mitesh is not only a skilled Sitecore CMS developer but also a 12+ years experienced software engineer proficient in various technologies such as MVC, ASP.Net, C#, jQuery, and Azure cloud/AWS.