Sitecore Azure web app Basic Authentication
Published: 7 November 2022

When it comes to normal websites or Sitecore individually, there should be protection against the external access while they are being developed.
There are approaches you can take to ensure this such as internal network, restrictions and whitelist IP limitation, etc. If you host your website in the IIS, then you can configure the basic authentication quickly and easily.
But when you are hosting your website in the Azure web app, it can be difficult to configure the basic authentication in your website. To configure this basic authentication, you can follow the below given steps in your Azure portal.
- Go to your website Azure app.
- Go to the “Advanced Tools” and click on “Go”. This will open “Kudu.”
- Open CMD in the debug console menu. This will open your root folder structure.
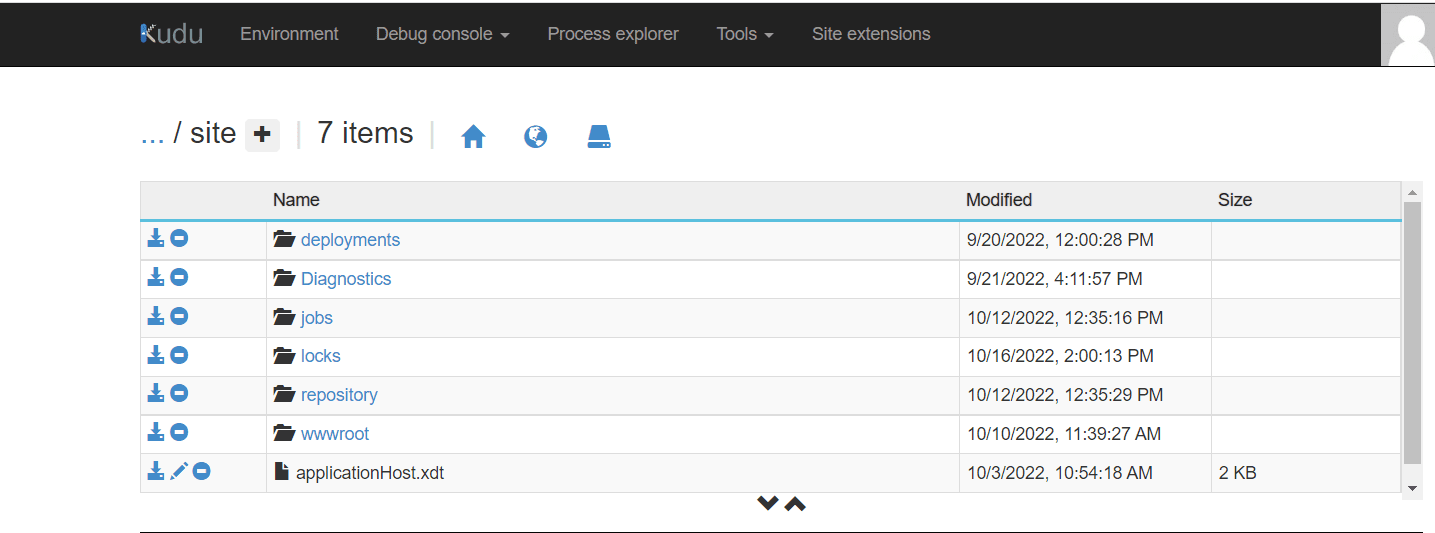
- Don’t forget to add the applicationHost.xdt file to this root folder. You can refer to the above image where we have uploaded the file.
For creating this file, copy the below code and add it to your xdt file after which you upload it to your root folder.
<?xml version="1.0"?> <configuration xmlns:xdt="http://schemas.microsoft.com/XML-Document-Transform"> <location path="%XDT_SITENAME%" xdt:Locator="Match(path)"> <system.webServer> <rewrite xdt:Transform="InsertIfMissing"> <allowedServerVariables xdt:Transform="InsertIfMissing"> <add name="RESPONSE_WWW_AUTHENTICATE" xdt:Locator="Match(name)" xdt:Transform="InsertIfMissing" /> </allowedServerVariables> <rules xdt:Transform="InsertIfMissing"> <rule name="BasicAuthentication" stopProcessing="true" xdt:Transform="InsertIfMissing" xdt:Locator="Match(name)"> <match url=".*" /> <conditions> <add input="{HTTP_AUTHORIZATION}" pattern="^Basic d2lsbGtpZTp3aWxsa2llX3NwIW54ZGlnaXRAbEAyMDIy" ignoreCase="false" negate="true" /> </conditions> <action type="CustomResponse" statusCode="401" statusReason="Unauthorized" statusDescription="Unauthorized" /> <serverVariables> <set name="RESPONSE_WWW_AUTHENTICATE" value="Basic realm=Project" /> </serverVariables> > </rule> </rules> </rewrite>> </system.webServer> </location> </configuration>- If you want to change the user and the password for the authentication popup as per your wish, you can update that in the pattern section. After the basic keyword, you can replace your base64string value. This is a combination of username and the password.
For creating the base64string, use Google Chrome developer tools. You can encode your credentials by yourself. All you have to do is open the developer tools in your browser (F12 on Windows/Linux.)
Then in the console, type the following and click on enter:
encodedData = "Basic " + window.btoa('YOUR_USERNAME:YOUR_PASSWORD')
You will also need to replace your own credentials for YOUR_USERNAME and YOUR_PASSWORD like this:
Now, copy this value (without the quotation marks) and update your xdt file. Then, upload it to the root folder of Azure Web Service.
Once you are done with all these changes, restart the Azure web app and check your website URL. You will get an authentication popup in your browser.

Mitesh Patel || Chief Technology Officer (CTO) | ADDACT
Sitecore AI Certified || XMCloud || OrderCloud Certified
Mitesh Patel is the Chief Technology Officer (CTO) at Addact with 12+ years of experience in enterprise CMS, digital experience platforms, and cloud-native application development. He specializes in Sitecore, Contentful, Strapi, Kentico, Umbraco, Contentstack, and .NET, helping organizations build scalable, secure, and future-ready digital solutions through modern CMS, headless architectures, AI-driven experiences, and cloud technologies.