OrderCloud Checkout Flow
Published: 6 October 2022
A checkout flow is a series of steps that a prospect needs to follow in order to pay for the product they want to buy. Checkout flow begins with an “Add to Cart” click and ends after the payment/Thank You page. Each of these steps must be designed for a seamless journey of the buyers, keeping the buyers motivated to purchase. One of our clients wanted to setup some promotion-based or we can say discount-based product checkout flow and we needed to implement it.
In eCommerce website, we have the requirement to add a 20% discount on some specific products where I can check which product has offers using OrderCloud. And whichever has the discount it will be shown in the final checkout process with 20% of discount to only those items that have a discount other than that product will calculate as a normal product price in final checkout process. To achieve this, we have added a custom extended property (XP).
Please refer below steps which we have followed to implement checkout flow in Ordercloud:
- In OrderCloud portal sandbox API for the product, we need to set the XP field in XP variable as like xp: {IsDiscountable : true, DiscountPer : 20} If the value is set true for any product that indicates as a discountable product.
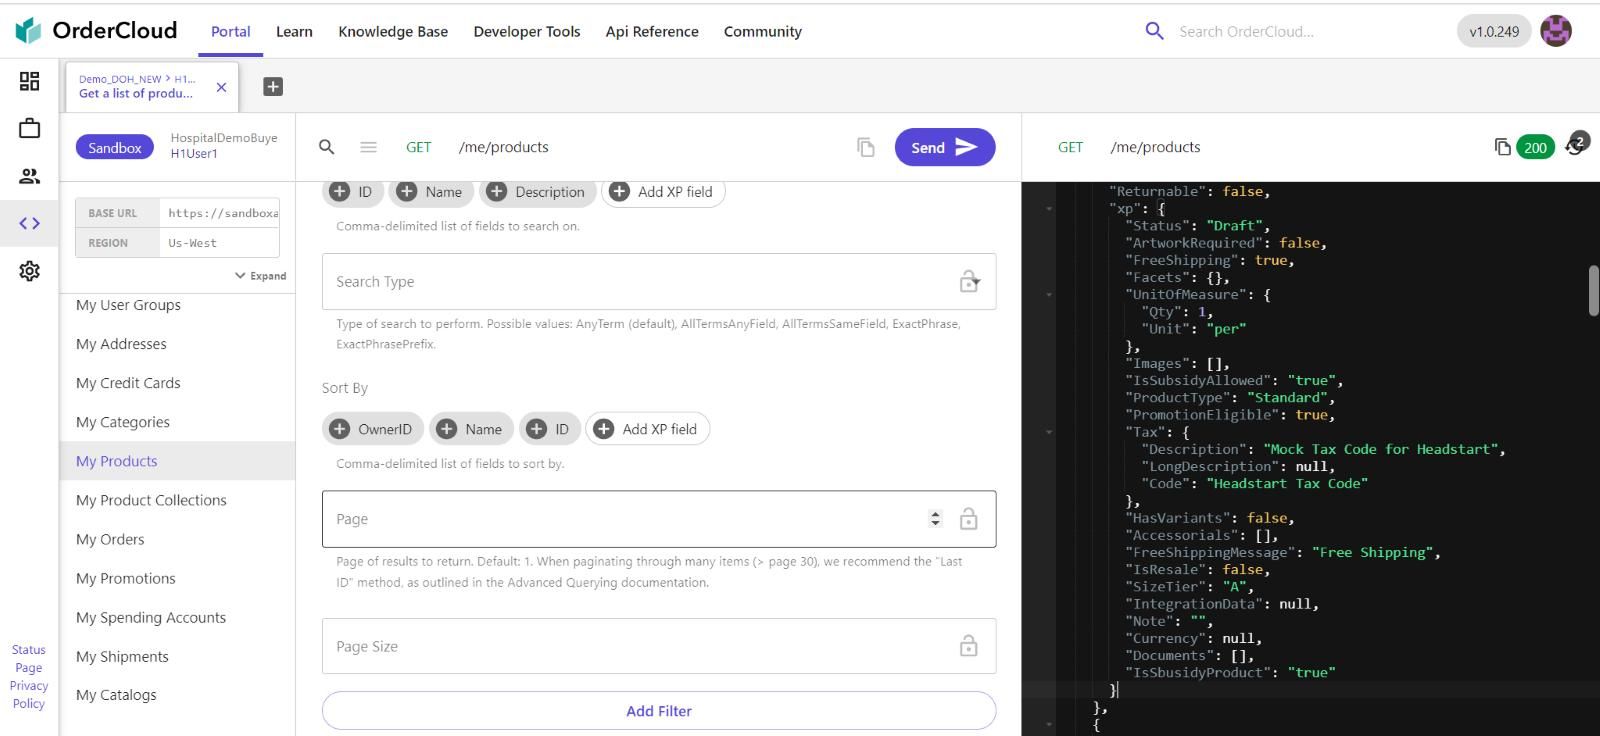
xp: {

  "Status": "Draft",

  "ArtworkRequired": false,

  "FreeShipping": true,

  "Facets": {},

  "UnitOfMeasure": {

    "Qty": 1,

    "Unit": "per"

  },

  "IsSubsidyAllowed": "true",

  "IsSbusidyProduct": "true"

}
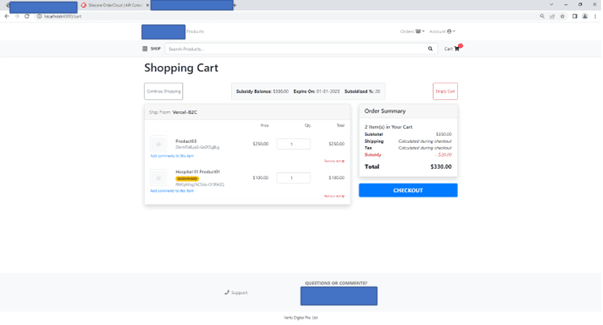
Checkout flow as per cart:
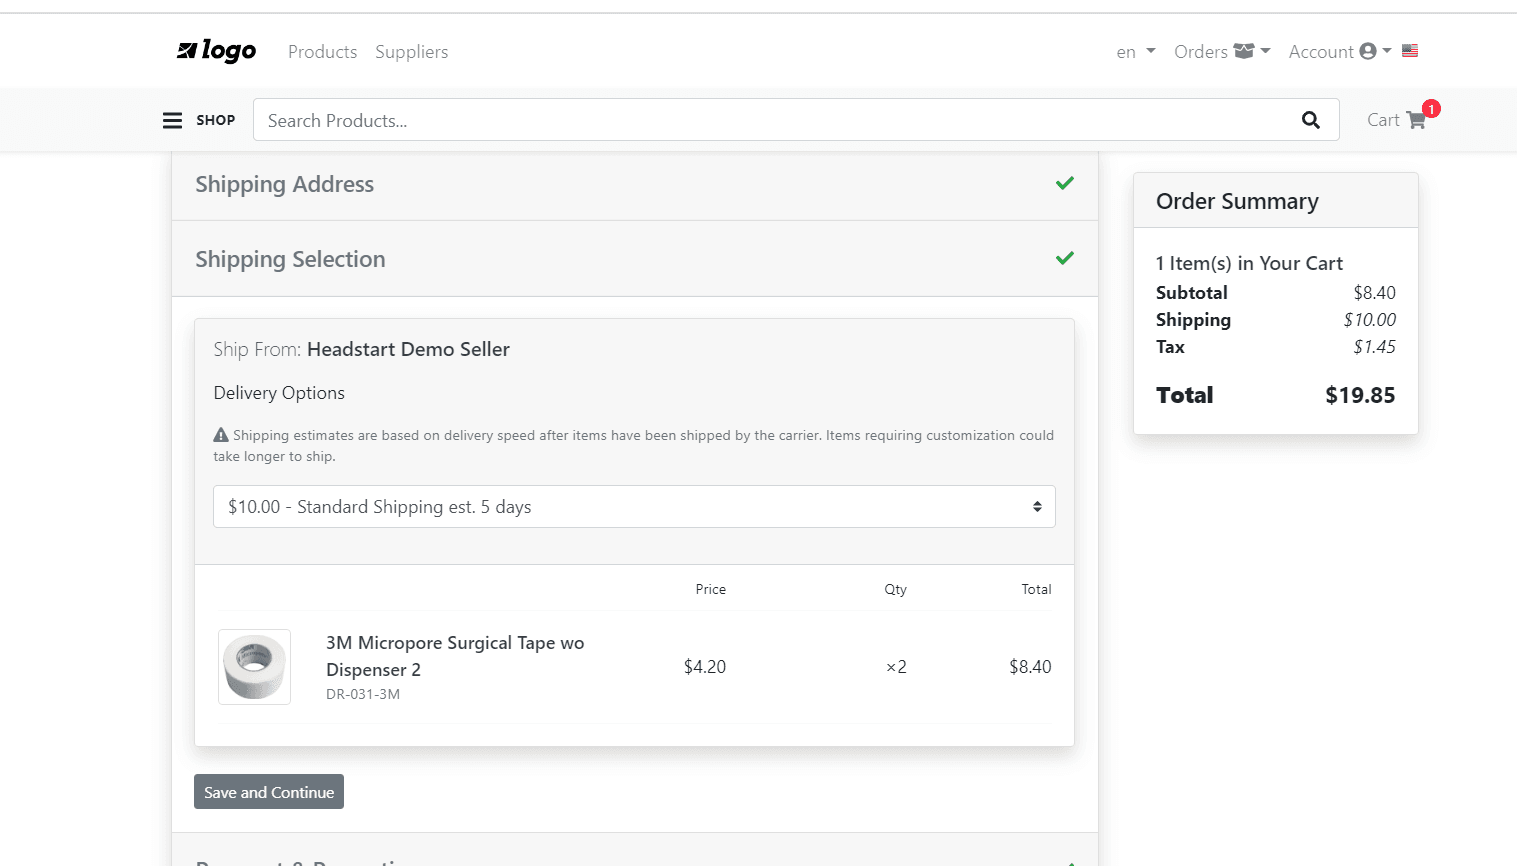
After adding the discounted product and normal product in check out final process you need to select the shipping address from the user, but before that, you need to configure your address through the smarty street which verifiesverifddress, in appSetting.json file you need to configure smarty street client ID. The listed Shipping address will show up when user saves the address in his profile. Or it will add new address.
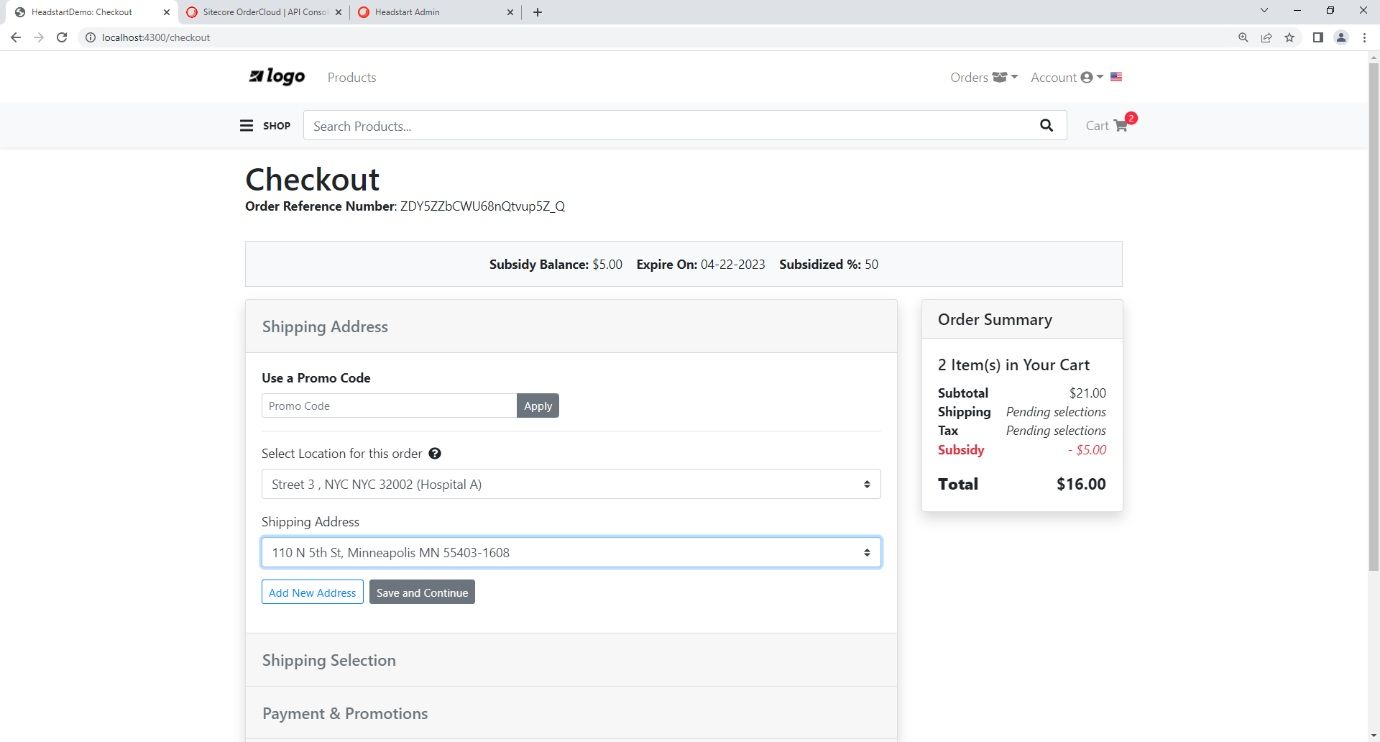
appSettinh.json (For Smarty Street) { Shape"SmartyStreetSettings:AuthID": "dd5fbd1a-7a24-63bf-0471-2253ce136705", Shape"SmartyStreetSettings:AuthToken": "gKQSXP3oDnE7hSAzohmp", Shape"SmartyStreetSettings:RefererHost": "https://localhost:5001", Shape"SmartyStreetSettings:WebsiteKey": "120286491399670288", }- Verify the shipping address the next step we need to follow is shipping selection where you need to select shipping standards.
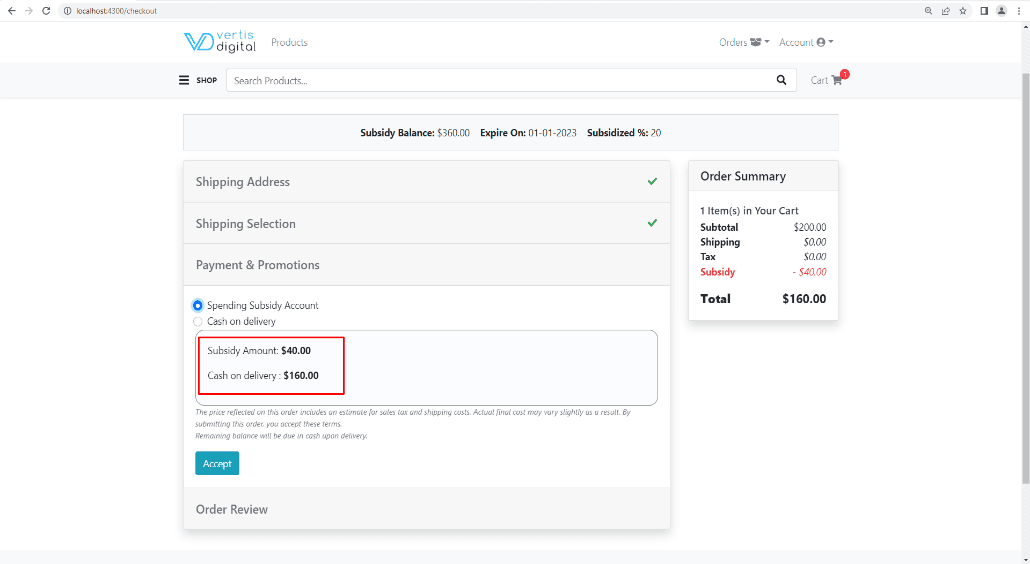
- 3rd step you need to follow is payment method where you can choose cash on delivery option and click on the accept button, in that you can also get the discounted amount on your product and total amount of product.
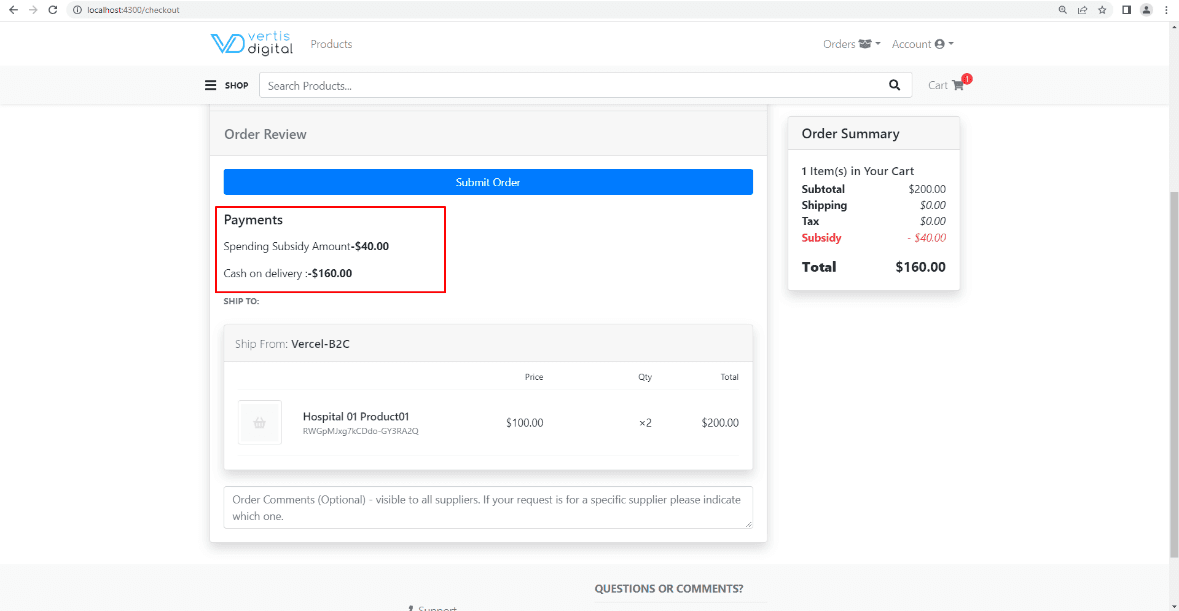
- After selection the payment method next step is to follow for order review where you can see your order, payment method, shipping address, and the policy for that order after clicking on the submit order your order will submit and generate the bill for that order.
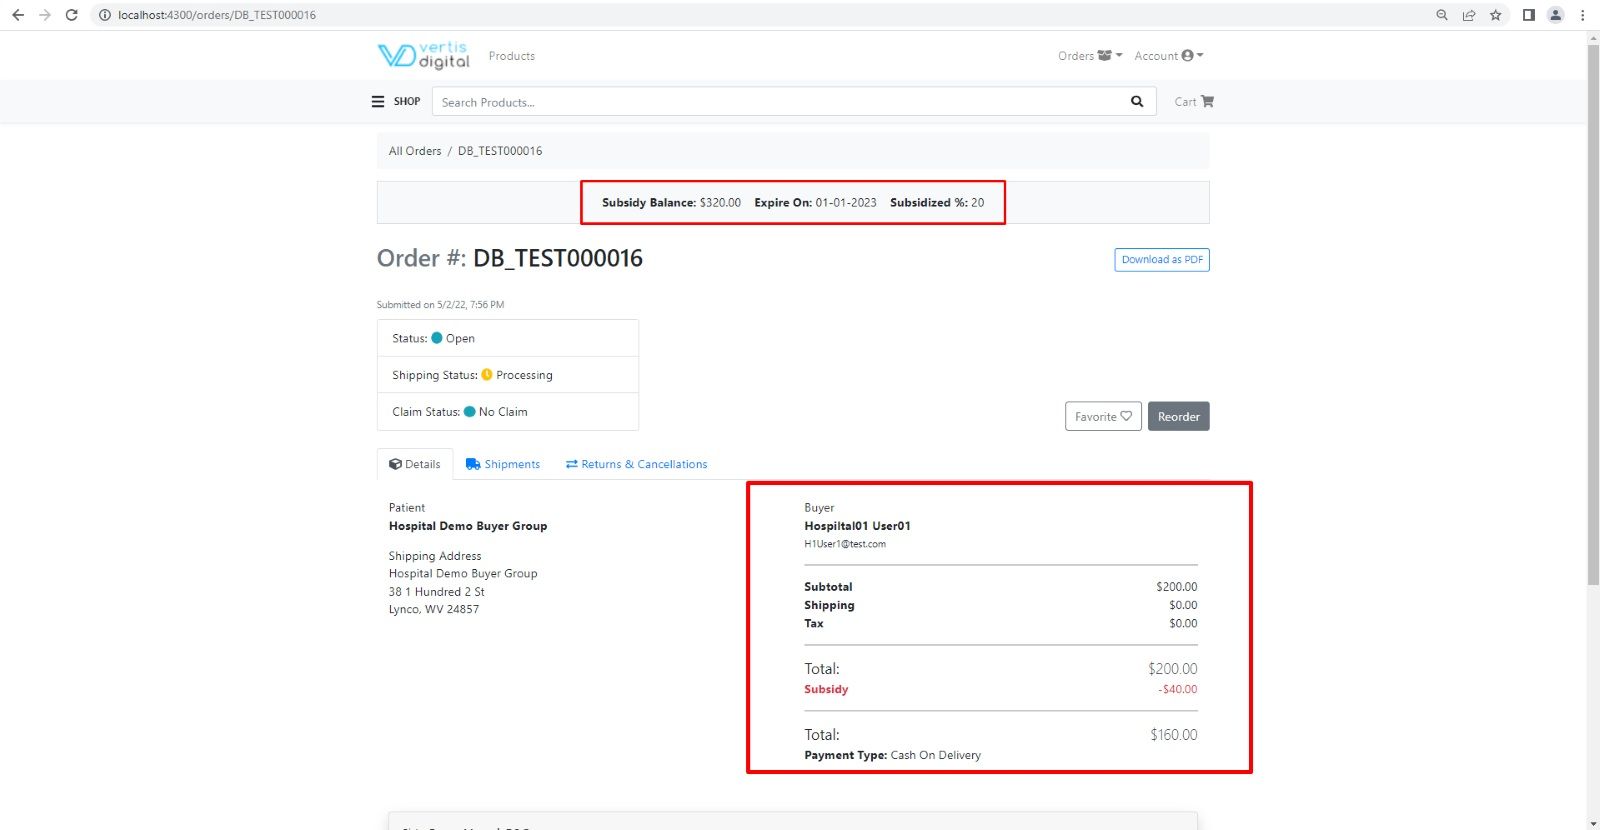
- After submitting the order, it will generate the final bill detail or order summary where it needs to calculate the payment method again and it will return the amount also and calculate the discount and discount amount in final stage final checkout process. And billing generation API will call from the middleware.
This is how the checkout process works in Order Cloud.

Mitesh Patel - Technical Head - ADDACT
Sitecore || XMCloud || OrderCloud Certified
Mitesh, a distinguished Technical Head at Addact/Addxp, is a prominent figure in Sitecore/XMCloud/OrderCloud certified writing. From Sitecore XM Cloud Developer Certification to Sitecore 10 .NET Developer Certification and Sitecore OrderCloud Certification, Mitesh's expertise is unparalleled. Mitesh is not only a skilled Sitecore CMS developer but also a 12+ years experienced software engineer proficient in various technologies such as MVC, ASP.Net, C#, jQuery, and Azure cloud/AWS.